Butterfingers Cheesecake Bars Recipe

Butterfingers Cheesecake Bars Recipe

Butterfingers Cheesecake Bars Recipe

Well, Junior year started off with a bang. There’s not much of an update in that respect, I guess. I really like all my teachers (yay! That makes school so much more fun!), and the new schedule that the school implemented was a really good idea. I am already used to it and I, quite honestly, love it. I’m in a play, which is also proving to be pretty fun, as my role is small enough that it isn’t stressful at all, but present enough that I get to be part of all the fun and shenanigans. I continue to be awed by the school that it’s hosted by. There were ramen noodles in the drinking fountain… explain that one to me!

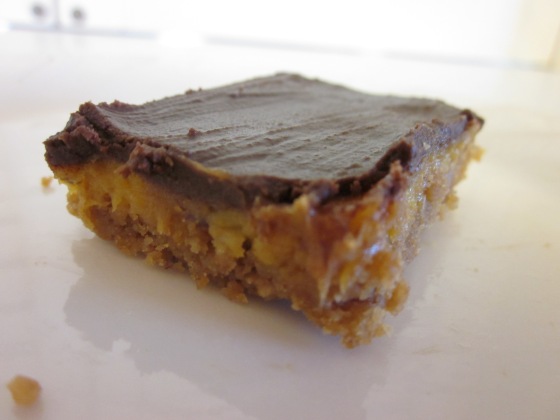
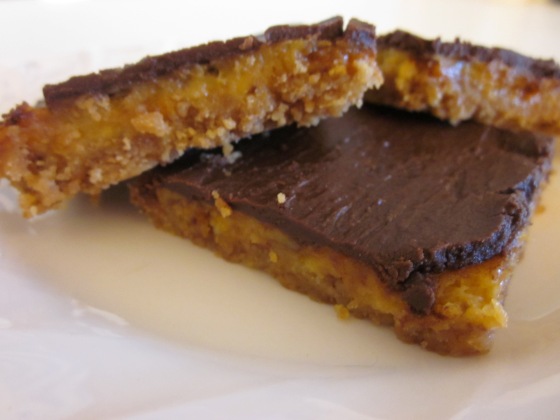
I assume you have probably already guessed about what my review is going to say-let’s see- I think I like cream cheese… just a little… alright, maybe love… like, unconditionally… And have I ever mentioned my love for butterfingers? Yes, they have a special place in my heart. Alright, not really, but you get the point. I love these bars! If you’re a fan of candy, these bars are a very rich cross between homemade heaven and candy. They are soft, creamy, chocolatey, peanut-buttery, and absolutely melt in your mouth. Give them a try!

This recipe serves 20 and takes about 1 hour to make.

Yield: 36 small squares

Butterfingers Cheesecake Bars (by Lauren’s Latest):

For the crust
16 whole nutter butter cookies
1/4 cup melted butter

For the filling
8 oz. cream cheese, softened
1/3 cup sugar
1 teaspoon vanilla extract
1 egg
1/2 tablespoon all purpose flour
6 fun size Butterfinger chocolate bars

For the topping
3/4 cup semi sweet chocolate chips
3 tablespoons butter

Directions:

1. Preheat oven to 325 degrees. Line a 9×9 square dish with lightly greased foil or parchment and set aside. Grind nutter butter cookies in a food processor until the consistency of graham cracker crumbs. Pour in melted butter and pulse a few times to mix. Press into prepared dish and set aside.

2. In a large bowl, whip cream cheese and sugar together until smooth. Stir in egg, vanilla and flour. Finely chop butterfingers and fold into the cheesecake mixture. Pour over top nutter butter crust and bake for 18-22 minutes or until cheesecake has set. Cool to room temperature, then refrigerate until completely chilled.

3. Pour chocolate chips and butter into a small bowl and microwave , stirring every 20-30 seconds. (If your chocolate is almost melted, don’t put it back into the microwave! Just keep stirring- the residual heat will continue to melt the chocolate completely) Spread melted chocolate over the top of the bars evenly and place back into the refrigerator for 5-10 minutes to harden the chocolate.

4. Remove from refrigerator and using the foil or parchment, remove the entire block of bars from the pan. Cut into bars and serve.

5. Enjoy!

Harvey Dent Brownies Recipe

Harvey Dent Brownies Recipe

Harvey Dent Brownies Recipe

You’re probably wondering about the name. Let me explain: if you have ever watched the second Batman movie (The Dark Knight), then you know that Harvey Dent is a character who seems good, but turns evil… and everyone in the movie feeds the illusion that he’s still good. The reason that I named this recipe after Harvey Dent was because these brownies are good (as in delicious!) but are truly evil in calories! And of course we all are feeding the illusion that they’re not so bad. Hee heeeee… two faced… just like Harvey Dent.  I took the liberty of re-naming these brownies due to an inappropriate name already given to them, and I would like to have a nice, clean blog.

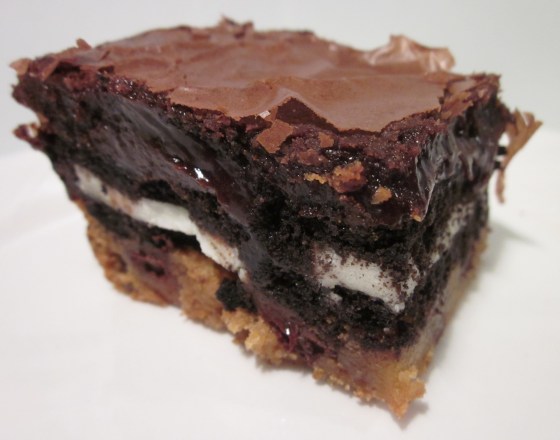
Anyway, these brownies (by the Londoner) are super easy, delicious and total comfort food! They’re gooey, chocolaty, cookie-y, and all around delicious. (I think that it’s best served warm out of the oven with a scoop of vanilla ice cream.)

Harvey dent Brownies Recipe:

1 chocolate chip cookie box mix

1 brownie box mix

20-ish Oreo cookies

1 tsp. oil

1 tsp. water

Directions:

1. Preheat the oven to 350 degrees and grease an 8×8 inch pan.

2. Follow the directions for the cookie dough on the back of the chocolate chip cookie mix and add 1 tsp. water and 1 tsp. oil to help it stay moist as it will be baked longer than the suggested time.

3. Press the dough onto the bottom of the greased pan and layer with enough whole Oreo cookies to cover the dough.

4. Follow the directions on the back of the brownie mix for batter and pour the batter over the Oreo-cookiedough arrangement.

5. Bake for 30-35 minutes or until edges of the brownie have set. The center should be gooey and a knife will not come out clean if inserted.

6. COOKIE!!! NOM NOM NOM NOM!!!! (Say to yourself in cookie monster voice.)

Cut-out Christmas Cookies Recipe

Cut-out Christmas Cookies Recipe

Cut-out Christmas Cookies Recipe

This is another recipe that has been passed down through the family for a few generations. It has a rather unique taste… I absolutely love the taste, but I know that it sometimes has to be acquired. The taste that I’m talking about is anise extract. To me it is Christmas’s most familiar and delightful smell and flavor. One whiff of anise and I immediately think of Christmas. These are great seasonal cookies for anyone… if you’ve never had anise then I will tell you that you’re missing out. If you’re an anise lover, this is your recipe!

Cut-out Christmas Cookies Recipe:

1 1/4 cup brown sugar

1 cup white sugar

1 cup (2 sticks) butter, softened

1 tsp. vanilla

2 eggs

4 1/2 cups flour

1 cup sour cream

1 tsp. baking soda

2 tsp. baking powder

1 pinch of salt

1/2 tsp. anise extract

Frosting:

2 cups. powdered sugar

1/2 tsp. anise extract

1 tsp. (1/3 Tbsp.) butter

milk, to desired consistency

Directions:

1. Beat brown sugar, white sugar, and butter together until smooth. Add vanilla, eggs, anise, and sour cream. Mix. Add the flour, baking soda, baking powder, and salt. Mix cookie dough on medium speed until thoroughly combined.

2.Chill dough for 2-3 hours (optional).

3. Preheat oven to 350 degrees and set out two greased cookie sheets. Roll cookies dough out on lightly floured surface to desired thickness (about 1/8 thick.) Use cookie cut-outs for your desired shapes.

4. Bake for 5-8 minutes or until golden brown. Move cookies immediately to a cool surface and let them cool completely before frosting them.

5. Mix frosting ingredients and decorate cookies with colored sugar (optional) while frosting is still wet.

6. Merry Christmas!!! Santa will want a platter or two.

Note:

This recipe makes a lot of cookies, so I usually select a dozen or two that I will frost; the rest I freeze to eat later. When the time comes to serve the frozen cookies, pull them out of the freezer and let them thaw for about 10 minutes before frosting them.