Tarragon Chicken Recipe

Tarragon Chicken Recipe

Tarragon Chicken Recipe

Tarragon Chicken Recipe

Tarragon Chicken Recipe

This is… heaven on a plate. Truly, if you eat it, you will probably die from a heart attack. But it is totally worth it. It’s creamy, buttery, delectable, tender, saucy, soft, and just the perfect combo of flavors- fresh and indescribably delicious!!! Definitely try this one out, even if you are a health nut! It is well worth the calories.

I have a fun ditty about this recipe that includes my parental units… so on the nights that my mom and dad are gone, my siblings and I often have some sort of quick meal planned. It happened one night that they had been gone for the past few nights, and… how do I put this? We had no clue what we were going to eat. With several all-devouring boys and hungry girls to feed, we wanted only the best. I jotted down the ingredients for the best recipe we knew, and my brother took me with him to the grocery store. We made a strategical strike and were out of the store quickly. As it happened, we got a call from my other brother saying that our parents were still home, and they couldn’t be allowed to see the groceries; they would know what we were up to. We figured that if we must, we could pull over, but as we drove down the final stretch of road towards our house a few minutes later, a familiar looking car passed. And it had two familiar looking people in it. Knowing we were out of the woods, we hurried home and got cracking. My siblings and I made ourselves a delicious meal and dubbed the evening “The Night of Rebellion.” There have only been a few of those since then. :) But all have included tarragon chicken. And we make references to it all the time.

Tarragon Chicken Recipe:

Rice, cooked accordingly for ~6 servings

6 lbs. chicken breasts, raw, cubed

2 tsp. salt

1 1/2 tsp. pepper

3 Tbsp + 3 tsp. olive oil

4 egg whites

1 stick (1/2 cup) butter

2 Tbsp. vinegar

4 cups (1 quart) whipping cream

2 Tbsp. dried tarragon leaves

salt and pepper to taste

3-4 diced tomatoes

additional cornstarch

Directions:

  1. Combine raw chicken, salt, pepper, cornstarch, olive oil and egg whites in a large bowl until the chicken is thoroughly coated.
  2. In a large pan, melt the butter. Pour the chicken into the pan and saute the chicken until golden.
  3. Once it is finished, add the vinegar, whipping cream, tarragon, salt, and pepper. Cook over medium heat until thickened to a saucy consistency. You may have to add more cornstarch. If you do so, add only a little at a time.
  4. Stir in the diced tomatoes (or use the tomatoes as a garnish, if you like.) Top the rice with some of the sauce, and serve!
  5. Enjoy this heavenly decadence.

Taco Soup Recipe

Taco Soup Recipe

Taco Soup Recipe

Taco Soup Recipe

Taco Soup Recipe

I am in several clubs this year… One is the Astronomy Club, which I started freshman year. It’s definitely come a long way, and I think this year will be even better than last year for the club. Our first year, there were only about five people at the meetings. Last year there were fifteen. This year, we have thirty people who signed up. Granted, I think we’ll get more like 20 who actually attend the meetings, but still… if we do, that makes us a significantly sized club. One of the other most successful clubs last year had 90 members. This year, that same club has a little under 20 members. Astronomy Club rules!!! :) I am also joining an environmental club, which sounds like it is going to be a blast! I am so excited for it!

This recipe is a family favorite- it’s light, up until you put all the toppings on. but hey! If you’re aiming for health, just leave the chips and cheese out! It’s plenty healthy and delicious without. My brother loved making this during his time in college. He would make a big batch of it at the beginning of the week and eat it for the remainder. He loved it. SO I guess my point is this: everyone loves this soup. It really is savory and healthy and goopy and everything else!

Taco Soup Recipe:

48 oz. jar Great Northern Beans (do not drain)

2 (14.5 oz) cans diced tomatoes

2 (15.25 oz) cans fiesta corn (with red and green peppers)

2 cups water

1 packet ranch seasoning

1 packet taco seasoning

tortilla chips

shredded cheddar cheese

sour cream

Directions:

  1. Combine all ingredients in a crock pot and stir every so often. If you forget to put it in the crock pot, you can still throw it all in a pot and warm it over the stove.
  2. Serve topped with crunched up tortilla chips, shredded cheddar cheese, and sour cream.
  3. Enjoy!

Cheesecake Stuffed Strawberries Recipe

Cheesecake Stuffed Strawberries Recipe

Cheesecake Stuffed Strawberries Recipe

Cheesecake Stuffed Strawberries Recipe

Cheesecake Stuffed Strawberries Recipe

Well… As of September 13th, I submitted a short story to the Popular Fiction contest held by Reader’s Digest.  Supposedly, I will hear back from them by the end of December. I submitted it in the thriller genre, but it is a bit on the milder side of thriller, I would say. It starts off pretty serene (or it’s supposed to, anyway) and ends-well- badly for all involved. I doubt that submission will yield anything, but hey! It’s fun to try. Wish me luck.

This recipe was REALLY good! You would think that cream cheese in a strawberry wouldn’t have much bang for the buck, but these were outstanding, quick, easy, and a crowd pleaser. Besides, they are so cute and pretty! they are definitely worth trying.

Cheesecake Stuffed Strawberries (By Fifteen.Spatulas)

1 quart strawberries

8 oz. cream cheese, room temperature

1 cup powdered sugar

1 tsp. vanilla

1 tsp. almond extract

Directions:

  1. Remove stems from strawberries and, using a lemon baller, scoop out a hole from the top of each strawberry

2. Cut a small part of the bottom with a sharp knife to create a flat surface for the strawberries to stand on.
3. Using a hand mixer, mix together the cream cheese, powdered sugar, vanilla extract, and almond extract until fluffy and light.
4. Into a piping bag lined with a star tip, transfer the cream cheese mixture and pipe the filling into each of the prepared strawberries.

6. Enjoy!

Butterfingers Cheesecake Bars Recipe

Butterfingers Cheesecake Bars Recipe

Butterfingers Cheesecake Bars Recipe

Well, Junior year started off with a bang. There’s not much of an update in that respect, I guess. I really like all my teachers (yay! That makes school so much more fun!), and the new schedule that the school implemented was a really good idea. I am already used to it and I, quite honestly, love it. I’m in a play, which is also proving to be pretty fun, as my role is small enough that it isn’t stressful at all, but present enough that I get to be part of all the fun and shenanigans. I continue to be awed by the school that it’s hosted by. There were ramen noodles in the drinking fountain… explain that one to me!

I assume you have probably already guessed about what my review is going to say-let’s see- I think I like cream cheese… just a little… alright, maybe love… like, unconditionally… And have I ever mentioned my love for butterfingers? Yes, they have a special place in my heart. Alright, not really, but you get the point. I love these bars! If you’re a fan of candy, these bars are a very rich cross between homemade heaven and candy. They are soft, creamy, chocolatey, peanut-buttery, and absolutely melt in your mouth. Give them a try!

This recipe serves 20 and takes about 1 hour to make.

Yield: 36 small squares

Butterfingers Cheesecake Bars (by Lauren’s Latest):

For the crust
16 whole nutter butter cookies
1/4 cup melted butter

For the filling
8 oz. cream cheese, softened
1/3 cup sugar
1 teaspoon vanilla extract
1 egg
1/2 tablespoon all purpose flour
6 fun size Butterfinger chocolate bars

For the topping
3/4 cup semi sweet chocolate chips
3 tablespoons butter

Directions:

1. Preheat oven to 325 degrees. Line a 9×9 square dish with lightly greased foil or parchment and set aside. Grind nutter butter cookies in a food processor until the consistency of graham cracker crumbs. Pour in melted butter and pulse a few times to mix. Press into prepared dish and set aside.

2. In a large bowl, whip cream cheese and sugar together until smooth. Stir in egg, vanilla and flour. Finely chop butterfingers and fold into the cheesecake mixture. Pour over top nutter butter crust and bake for 18-22 minutes or until cheesecake has set. Cool to room temperature, then refrigerate until completely chilled.

3. Pour chocolate chips and butter into a small bowl and microwave , stirring every 20-30 seconds. (If your chocolate is almost melted, don’t put it back into the microwave! Just keep stirring- the residual heat will continue to melt the chocolate completely) Spread melted chocolate over the top of the bars evenly and place back into the refrigerator for 5-10 minutes to harden the chocolate.

4. Remove from refrigerator and using the foil or parchment, remove the entire block of bars from the pan. Cut into bars and serve.

5. Enjoy!

Pum Pum Cake (Pumpkin Yum Yum Cake) Recipe

Pum Pum Cake (Pumpkin Yum Yum Cake) Recipe

Pum Pum Cake (Pumpkin Yum Yum Cake) Recipe

In August, my and my family had a big get-together… just us. We spent the weekend as a family playing games, swimming, eating, playing games, eating, eating… so food was part of the event for sure. :) It was very fun, and I decided to make a family favorite- Yum Yum Cake- but with a twist. Well, we called it many things. Pumpkin Yum Yum Cake, Pum Pum Cake, Pum Yum Cake, Yum Pum Cake, and the like. Our two favorites were Pum Pum Cake and Pum Yum Cake.

So it’s a cake of many names. And many yums. Seriously, everyone thought it was very good, and even more goopy than yum yum cake. Gotta love it! Pumpkin and caramel go so well together, and, well… I’m not sure why I didn’t think to do this earlier. It was certainly a hit- I recommend it, as usual!

Pum Pum Cake Recipe (Adapted from The Devil’s Food Cookbook):

1 box yellow cake mix

1 (14 oz.) can pumpkin puree

1 (14 oz.) can sweetened condensed milk

1 (17 oz.) jar Mrs. Richardson’s Butterscotch Caramel Sauce

1 (8 oz.) container Cool Whip

1 (8 oz.) bag of Heath candy bits

Directions:

1. Prepare the yellow cake as directed on the box, with the addition of mixing in the pumpkin puree (bake in a 13×9 inch pan, not two round pans). It will take a bit longer to bake with the pumpkin. After it has finished baking and cooled for a little while, use the end of a wooden spoon to poke many holes all over the cake (don’t be shy. No one will ever see the holes but you!) and pour the caramel sauce and sweetened condensed milk over the cake.

2. When you’re sure that the cake is COMPLETELY cooled, frost it with the Cool Whip. Sprinkle as much or as little of the Heath bits on top of the cake as you wish.

3. Enjoy!

Grilled Peaches Recipe

Grilled Peaches Recipe

Grilled Peaches Recipe

Sometimes recipes aren’t about the actual ingredients or anything. It’s just the idea, and spreading it. This recipe is super basic. There’re no tricks or catches. It’s really just what it looks like: grilled peaches with butter and cinnamon. But let me tell you- so delicious!!!! The peaches get really soft and the butter on top makes them quite savory. Plus, it’s super easy, and doesn’t take long at all. :)

Grilled Peaches Recipe (adapted from The Mama Report):

5 or 6 ripe peaches- cut in half, pit removed

1/2 cup (1 stick) unsalted butter at room temperature

1/4 cup of honey (more or less depending upon preference)

1/4 teaspoon cinnamon

a dash of salt

a pinch of nutmeg

additional cinnamon for garnish

Directions:

  1. Placed the peaches cut side down on the grill. Cook for about 5-7 minutes.
  2. For the butter, beat the remaining ingredients together until the butter is somewhat fluffy.
  3. Once the grilled peaches are ready, simply apply a tab of butter on top of the peaches and sprinkle with cinnamon.
  4. Enjoy!

Quinoa Stuffed Bell Peppers Recipe

Quinoa Stuffed Bell Peppers Recipe

Quinoa Stuffed Bell Peppers Recipe

Quinoa Stuffed Bell Peppers Recipe

My family was raving about this one. It’s super tasty, fresh, and it just tastes healthy! Plus, it’s a meal in and of itself and a good vegetarian recipe at that! :) The pepper gives it a really fresh taste, and the beans and quinoa make it sort of bready and just delicious! That wasn’t the best description, but WE INTERRUPT THIS BROADCAST: It’s a bit difficult to type between shifts of running around the house and chasing my brother because he stole my “writing pillow.” I’ve been trying to type this sentence for a half hour now…

Note: Serves 6

Quinoa Stuffed Bell Peppers Recipe (by Damn Delicious):

3 cups cooked quinoa

1 (4-ounce) can green chiles

1 cup corn kernels

1/2 cup canned black beans, drained and rinsed

1/2 cup petite diced tomatoes

1/2 cup shredded pepper jack cheese

1/4 cup crumbled feta cheese

3 tablespoons chopped fresh cilantro leaves

1 teaspoon cumin

1 teaspoon garlic powder

1/2 teaspoon onion powder

1/2 teaspoon chili powder, or more to taste

Kosher salt and freshly ground black pepper, to taste

6 bell peppers, tops cut, stemmed and seeded

Directions:

1. Preheat oven to 350 degrees F. Line a 9×13 baking dish with parchment paper.

2. In a large bowl, combine quinoa, green chiles, corn, beans, tomatoes, cheeses, cilantro, cumin, garlic, onion and chili powder, salt and pepper, to taste.

3. Spoon the filling each each bell pepper cavity. Place on prepared baking dish, cavity side up, and bake until the peppers are tender and the filling is heated through, about 25-30 minutes.

4. Enjoy warm :)

Cherry Sweet Rolls Recipe

Cherry Sweet Rolls Recipe

Cherry Sweet Rolls Recipe

Cherry Sweet Rolls Recipe

Cherry Sweet Rolls Recipe

This recipe was certainly fun to try. In fact, I woke up one morning and my sister and I were the only ones home. And we had no chores. I was pretty happy, and I had been looking for a time to make this recipe. So, I figured, what the heck? I just went ahead and made it. I woke her up when it was ready, which was also pretty fun. I thoroughly enjoy waking her up because that means that I can blare music and shake her obnoxiously. Well, I suppose there no way to do that without being obnoxious, but hey. It’s fun. And she doesn’t get mad. :) Anyway, we enjoyed a nice quiet morning and had our rolls. Of course, I cut the recipe in half but it still made way too many rolls for just me and my sister… oh well. The leftovers were good too! In fact, the leftovers were even softer.

And that’s saying something. This recipe yields very soft rolls, and they’re pretty sweet too. The cherries provided a nice bursting flavor and a certain tartness to compliment the sweetness. The glaze was surprisingly delicious as well! I didn’t think that the half and half would make a difference, but it really does change the taste of the glaze and is perfect for this recipe!

Note: Serves 24 large sweet rolls

Try it with homemade filling!

Cherry Sweet Rolls Recipe (adapted from Lemon Sugar):

For the Dough

1 3/4 cups warm water (about 110 degrees F)

1/4 cup + 2 tbsp. white sugar

1/4 cup vegetable oil

3 tablespoons yeast (yes, that much)

1 1/2 tsp. sea salt

1 large egg at room temperature

5 1/2 cups all-purpose flour

For the Filling

1 (15 ounce) cans sweet cherry pie filling

For the Glaze

2 cups powdered sugar

1/4 cup half and half

1/2 teaspoon vanilla extract

1 tablespoons unsalted butter, melted (optional)

Directions:
For the rolls:
1. Prepare two large cookie sheets (half-sheet size) with parchment paper. Set aside. In a large bowl , combine water, yeast, oil and sugar. Let sit for 10 minutes. Add egg, flour and salt, and mix for 10 minutes (I used the dough hook on my stand mixer).
2. Pour dough onto a floured surface, and knead until dough is soft, smooth and not too sticky. Only add additional flour if it’s unworkable and sticking to the surface and your hands.

3. Roll dough into a large rectangle, approximately 18×26 inches.

For the Filling and Assembly:

4. Evenly spread can of cherry pie filling over dough, leaving the top 1-inch of the dough uncovered. Slowly roll the dough into a log. This will be messy. Cut into 24 1-inch pieces. Place rolls on to prepared cookie sheets. Cover them with clean towels and set aside to rise for 20 minutes in a warm, draft-free spot.

5. Meanwhile, preheat oven to 400 degrees. Bake for 10-15 minutes or until golden brown.

For the Glaze

6. Combine all ingredients (sugar, half and half, vanilla, butter) in a medium sized bowl. Stir or whisk until smooth. Pour glaze over rolls as soon as they come out of the oven.

7. Enjoy!

Cinnamon Crisps and Fruit Salsa Recipe

Cinnamon Crisps and Fruit Salsa Recipe

Cinnamon Crisps and Fruit Salsa Recipe

Cinnamon Crisps and Fruit Salsa Recipe

Cinnamon Crisps and Fruit Salsa Recipe

Cinnamon Crisps and Fruit Salsa Recipe

Cinnamon Crisps and Fruit Salsa Recipe

Cinnamon Crisps and Fruit Salsa Recipe

Cinnamon Crisps and Fruit Salsa Recipe

Okay… this stuff is just plain awesome. It’s sweet and not all that bad! Plus, it’s an appetizer… what??? Crazy! :)

It’s a super crisp, tasty salsa and the chips are just wonderful and super easy. Very crunchy and sweet. This recipe is just a winner. I’m not sure how else to put it.  It’s all that and a bag of chips, you might say. Besides, this recipe is really not very complicated. It just takes a little time to chop up the fruit. But that’s really most of the recipe. So, I highly recommend this recipe! If you’re having guests over, I guarantee that they will enjoy this appetizer!

Cinnamon Crisps and Fruit Salsa Recipe (by Spend With Pennies):

For the Cinnamon Crisps

10 flour tortillas (10″)

Cooking spray

⅓ cup sugar

1 teaspoon cinnamon

For the Fruit Salsa

2 granny smith apples

1 lemon

2 kiwis

1 lb strawberries

½ lb raspberries

1 tablespoon brown sugar

3 tablespoons preserves (I used raspberry)

Directions:

1. For the Cinnamon Crisps: Preheat oven to 350 degrees. Combine cinnamon & sugar. Set aside. Working with 3 tortillas at a time, spray both sides of of the tortilla and sprinkle each side lightly with cinnamon sugar. Stack 3 tortillas and using a pizza cutter, cut tortillas into 12 wedges. Place on a baking sheet and bake 8-11 minutes or until crisp.

2. For the Fruit Salsa: Zest the lemon and set aside. Peel and finely chop apple, squeeze 2 teaspoons lemon juice over apples and mix well to combine. Finely chop strawberries and kiwis. Gently combine all ingredients, the raspberries will break apart a bit but that’s what you want.

3. Serve room temperature and enjoy!

Spinach Artichoke Stuffed Chicken Recipe

Spinach Artichoke Stuffed Chicken Recipe

Spinach Artichoke Stuffed Chicken Recipe

Spinach Artichoke Stuffed Chicken Recipe

Spinach Artichoke Stuffed Chicken Recipe

For you spinach and artichoke lovers, this is your recipe! I, surprisingly, am one of said spinach and artichoke lovers. It’s just such a good, classic combo! And besides, of all meats, chicken is my favorite. Naturally, when I stumbled across this recipe on Pinterest, I knew that I must try it. Besides, it has very nice presentation and I just felt happy making it. It was also surprisingly easy, so don’t be afraid to try this one!

Well, what can I say? The chicken was perfectly cooked, very tender. The stuffing was excellent too! I was a little hesitant about how it might turn out, but I really was wonderful! It was very creamy and soft, and the spinach artichoke flavor was perfect! My only recommendation is not to forget the salt and pepper like I did. It just needed that extra little oomph. :) But it was fabulous and you should try it!

Spinach Artichoke Stuffed Chicken Recipe (by little bits of real food & real talk):

2 light swiss laughing cow wedges

1/4 cup steamed spinach with water ringed out (I used 1 cup of frozen and it came down to 1/4 cup after warming and ringing dry)

1 artichoke heart, chopped (from a can)

1/4 teaspoon garlic powder

1/8 teaspoon salt

1/8 teaspoon pepper

2 chicken breasts (about 6 oz. each)

more salt & pepper for chicken

Directions:

1. Preheat oven to 350 degrees.

2. In a small bowl combine cheese wedges, spinach, artichoke, garlic powder, salt & pepper. Mix with a fork until well combined.

3. Lay your chicken breast down on a cutting board and slice it in half so you have two thin halves. Lay all 4 pieces between 2 sheets of plastic wrap. Take the flat side of a meat tenderizer and pound the chicken until very thin. Sprinkle salt and pepper on both sides of the chicken.

4. Spread about 1-2 tablespoons of the spinach artichoke mixture on the chicken and spread it to coat the chicken. Roll each piece of chicken and hold in place with tooth picks.

5. Place rolls on a baking sheet lined with tin foil and bake for 20-22 minutes.

6. Enjoy!

Peach Cobbler Recipe

Peach Cobbler Recipe

Peach Cobbler Recipe

Peach Cobbler Recipe

Peach Cobbler Recipe

Nothing like some good peach cobber for summertime!

This recipe is super easy and perfectly delicious! It’s buttery and soft, and the peach flavor… well, you can’t go wrong with this recipe! It’s especially tasty when using home grown peaches. Even the top forms a sort of crustiness that is super delicious!

You’ll probably read the directions and think, “Hey! Katy’s picture had peaches on the bottom  but the recipe says to put the peaches on top! That little liar…” I promise I followed the directions the same as I gave them to you! :) It’s just that the peaches sink to the bottom while it bakes. That being said, enjoy!

Peach Cobbler Recipe:

         1/2 cup butter

3/4 cup flour

1 (15 oz.) can peaches, drained

2 tsp. baking powder

1/8 tsp. salt

3/4 cup milk

1 cup white sugar

Directions:

1. Preheat the oven to 350 degrees and set out an 8×8 pan, ungreased.

2. Put butter in the 8×8 pan. and put in the oven until melted. In a separate bowl, mix in sugar, flour, baking powder, salt and milk.

3. Pour the mixture over the melted butter and do not stir! pour the can of drained peaches over the top.

4. Bake for 55-60 minutes.

5. Enjoy the tastes of summer!

Grilled Bananas S’mores Recipe (no grill required)

Grilled Banana S'mores Recipe (no grill required)

Grilled Banana S’mores Recipe (no grill required)

Grilled Banana S'mores Recipe (no grill required)

Grilled Banana S’mores Recipe (no grill required)

I cannot stand bananas. I can’t force any more than a single bite into my mouth. I can eat bananas with something, but never alone. I’ll admit, I selected this recipe believing that I would not like it at all. I was pleasantly surprised.

In fact, I LOVED this recipe! The banana itself was super soft and pudding-y, and the marshmallows and chocolate were just, wow. It was sooooo good! I was so surprised that I liked it at all, and even more so that I really loved it! Better yet, it was super quick and really easy. I have no idea how on earth to use a grill, but hey… A girl’s gotta do what a girl’s gotta do- I improvised. I wrapped them in foil and put them in the oven, right on the rack, and they turned out marvelously!!!

Grilled Banana S’mores Recipe (adapted from the Girl Who ate Everything):

1 banana, peeled

2 tablespoons miniature marshmallows

2 tablespoons semi-sweet chocolate chips

Directions:

  1. Preheat the oven to 450 degrees.
  2. Slice banana lengthwise and slightly open. Place on a rectangle of aluminum foil.
  3. Insert marshmallows and chocolate chips into the sliced banana.
  4. Wrap banana up in foil and bake in the oven for 5-6 minutes.
  5. Unwrap banana and serve this wonderful treat warm!

Vegan Southwest Salad Recipe

Vegan Southwestern Salad Recipe

Vegan Southwestern Salad Recipe

Vegan Southwestern Salad Recipe

Vegan Southwestern Salad Recipe

This recipe is the epitome of a quick, easy, healthy, and super fresh tasting recipe (bonus: it’s vegan)! It’s super simple to whip together and a crowd pleaser, as well as super summer-y. I promise you won’t be disappointed. My mom was raving about this recipe for a while. She seemed to think it was the best thing since sliced bread. :)

Ok, I just have to say this: thanks to everyone who reads this blog and supports me. Just last week I got a record amount of hits, so I’m pretty stoked! I had a dry spell that dragged my hits down along with it, so I wasn’t sure when the recovery would begin. Well, it happened all at once and has been pretty good since then. So thanks to everyone who reads, supports, assists, answers my questions, shares, EVERYTHING! :)

Vegan Southwestern Salad Recipe (by SheKnows):

2 cups corn kernels

1 cup red onion, chopped

1 (15 ounce) can black beans, rinsed and drained

2-3 Roma tomatoes, seeded and diced

1 tablespoon olive oil

Grated zest and juice of 1 lime

2 teaspoons adobo seasoning

Pepper to taste

1 avocado, chopped

3 tablespoons fresh cilantro, finely chopped

Directions:

  1. In a large bowl, combine all ingredients.
  2. That is literally it. Just serve and enjoy!

Saint Lucian Chocolate Tea Recipe

Sorry! I don’t have a picture for this recipe, but trust me… it’s amazing!

Chocolate Tea. I swoon at the very mention of it! I found out about this liquidized heaven when I was on a trip to Saint Lucia. I stayed at the La Haut Plantation with my mom and sister and every morning the plantation staff would have a breakfast buffet prepared… at the end of the buffet the beverages (which consisted of Chocolate Tea and all these amazingly tasty juices made from strange fruits or flowers) would be neatly assembled. I always tried some of the juices, but I had their Chocolate Tea religiously every morning as if my life depended on it. When they were late to get it out one morning, I just about died- no Chocolate Tea? WHAT?? I guess it’s a very popular drink in Saint Lucia, and I have no problem what-so-ever seeing why. :) Luckily, my Mom realized that the staff on the plantation sold the recipe, as well as locally dried and ground cocoa. I had to get my hands on both, of course!

As for the description, it creamy, spicy, and fluffy. Yes, that’s what it is. I know what you’re probably thinking right now, but that’s what the cornstarch in this recipe is for. It doesn’t make the drink thick or pudding-like in the least… it just makes it fluffy. I don’t know how to put it. No using skim milk for this recipe no matter what. It’ll ruin the texture and the flavor of the drink. Also, was I just not very knowledgeable, or is it very cool that bay leaves come from a cinnamon tree? And that nutmeg comes from the pit of a peach-like fruit? I don’t know these things.

Chocolate Tea Recipe:

1 cup cocoa powder

4 cups water

1 (14 oz.) can evaporated milk

1/3 cup 2% milk or cream

2 bay leaves

1 tsp. vanilla

2 tsp. cinnamon

a dash of nutmeg

2 Tbsp. cornstarch

Directions:

1. Over medium heat, boil the water, cinnamon, and bay leaves together for 15 minutes. Add the cocoa to the boiling water and boil for another 10 minutes. Add the evaporated milk and 2% milk and heat until hot but do not boil.  Using a whisk to stir it in, sprinkle the cornstarch into the cocoa mixture. Add the vanilla. Remove the bay leaves (or strain the mixture if you like).

2. Pour it into a mug. Add sugar to taste (it will be bitter without the sugar) and serve.

 3. This will redefine your definition of tea (or hot cocoa… either way)! :)

Peach Pie Recipe

Peach Pie Recipe

Peach Pie Recipe

Peach Pie Recipe

Peach Pie Recipe

Peach Pie Recipe

Peach Pie Recipe

Peach Pie Recipe

Peach Pie Recipe

Oh summer! Ah summer! Summer, for me, is pie season. I think I just think of it that way because for the longest time, I was incapable of making a pie. It was the one culinary dish that I had yet to defeat. So, one summer, I just decided that no matter how frustrated I would become with ripping the crust, making it too crumbly, not crumbly enough, burnt, underdone, ANYTHING… I would not stop making pies until I got them right. My family liked it, anyway. :) That is also probably why I have so many pie recipes on my blog…

You will never hear me say anything bad about a peach pie. I mean, what’s not to like? The crust is flakey and the sugar on top just pushes the crust over from good to fabulous! And, of course, the filling is wonderful! However, I have some help from home grown peaches, which my family and I call “peaches n’ cream peaches” because of their taste and white flesh. They’re excellent! But that being said, this pie is delicious with any peaches you use, and you can count on this recipe being a good one!

Peach Pie Recipe:

(From Betty Crocker)

For Crust:

2/3 cup butter

2 cups flour

1 tsp. salt

4-5 Tbsp water

For the Filling:

5 cups fresh sliced peaches

1 tsp. lemon juice

1 cup sugar

1/4 cup flour

1/4 tsp. cinnamon

2 tbsp. butter

Directions:

1. Preheat the oven to 425 degrees and set out an ungreased 9 inch pie plate.

2. For the crust: Cut butter into flour and salt until particles are the size of small peas. Sprinkle in water, 1 tablespoon at a time, tossing with fork until all flour is moistened and pastry almost cleans the sides of the bowl.

 3. Gather dough into a ball and cut it in half.  Roll out one of the halves of dough on a lightly floured surface until the pastry is about two inches larger than inverted pie plate. Fold the pastry into quarters; ease into plate and unfold. Then press it firmly against the bottom and side.

4.  For the filling: Mix stir all ingredients together (except for the butter) in a large bowl until the peaches are thoroughly coated. Dump the filling into the pie plate, making sure that it is evenly spread, and dot the butter on top.

5. Roll out the other half of the dough on a lightly floured surface until the pastry is about two inches larger than pie plate. Fold the pastry into quarters; ease it onto the filling and carefully unfold it. Cut off any excess dough, leaving about an inch of dough hanging off of the pie plate’s edge. Fold the dough under and flute.

6. Cover the fluted edge with aluminum foil so that it will not burn and place the pie plate on a cookie sheet. Cut slits in the  crust top and sprinkle the crust generously with sugar. (DO NOT SKIP OR SKIMP ON THE SUGAR! It bakes on very well and makes the crust 100% even more delicious!)

7. Bake the pie for 30 minutes. Remove the foil and bake for 10-15 more minutes. When you take it out, it should be a rich golden brown (as pictured above) and thick syrupy goo should be bubbling out of the slits.

8. Enjoy warm with a scoop of vanilla ice cream and enjoy the tastes of summer!

Chicken Cranberry Nut Wrap Recipe

Chicken Cranberrry Nut Wrap Recipe

Chicken Cranberry Nut Wrap Recipe

Chicken Cranberrry Nut Wrap Recipe

Chicken Cranberry Nut Wrap Recipe

Summer in a wrap. That’s what this is. Literally. Not only that, but it’s HEALTHY and tastes way better than actual chicken salad. Not only is this recipe healthy, but it’s super filling, which is a great combo. Everyone in my family was raving! My sister even commented that she didn’t know something healthy could be so delicious ;)

I’ve been loving pinterest, especially for finding recipes like this! I have, I believe, three food boards.. One is for recipes I want to try, the other is for recipes that I approved but didn’t want to lose track of, while the last is for healthier foods like this recipe. But trust me, I have a lot of other boards… Astronomy, Humor, Disney and movies, Fashion, Travel, Projects, Life Hacks, Writing Inspiration, Quotes, and (yes, I admit it) a secret wedding board. Hey, if a girl has pinterest, one can assume that she has a secret wedding board. Seriously, though, if you want to find good recipes, Pinterest is the place! I am constantly amazed at how creative some people can be with food.

Note: This recipe takes 15 minutes to make if the chicken is pre-prepared. It makes 6 servings.

Chicken Cranberry Nut Wrap Recipe:

6 multi-grain tortillas

1.5 lbs Southwestern seasoned chicken breast, cut into strips (see Note at the bottom of this post)

1 diced tomato

1/2 cup dried cranberries

1/2 cup pecan mix

1/2 cup (5.3 oz.) plain Greek yogurt, (I used Chobani)

1/2 head of chopped lettuce

1/2 tsp. tarragon

2 tsp. white vinegar

kosher salt and black pepper to taste

Directions:

1. In a medium bowl, combine all of the ingredients except for the multi-grain tortillas. Stir until well combined.

2. Fill each tortilla with the filling and fold neatly.

3. Enjoy your summer!

Note: If you’re not sure what to do for the chicken, I just got 1 packet of McCormick’s Mexican Fiesta marinade mix. I followed the directions for making the marinade, put 1.5 lbs chicken breasts in a pan, and pour the sauce over. Then I covered the pan and baked the chicken at 350 degrees F for 1 hour. It was very tender and fell apart, just as it should :)

Pretzels and Cheese Sauce Recipe

Pretzels and Cheese Dip Recipe

Pretzels and Cheese Dip Recipe

Pretzels and Cheese Dip Recipe

Pretzels and Cheese Dip Recipe

Sometimes, I look through my school year planner and wonder how I managed to fit everything in that I did. And then I am so thankful for summer break. This year, my summer break is even a week longer (yay!) because my school is finally breaking down to install some air conditioning. Thank goodness! Looks like there will be no more heat days. Yes, that’s right. We have been dismissed from school early several times before because it was so hot in the school that people were starting to pass out. But no more! My class jokes all the time about how, as soon as we arrive, our high school went through a string of pretty big changes. Alumna who ask me how school is going are usually floored when I list the changes that have taken place in the past two years. Even our schedule next year is being changed (I think I’ll like it a lot!).

This recipe was quite a hit, most notably with my little brother. He ate and ate and ate, and when he went to bed, he asked if he could have more pretzels and cheese dip for lunch. The pretzels were super soft and had an excellent but not overpowering flavor, which I was worried about when I made this recipe (2/3 cup baking soda! That’s a lot!). But no, it tasted fabulous, and the cheese dip was a nice complement and didn’t overpower the taste of the pretzel either. With five people in the house, we polished these pretzels off in no time.

Note Note: This recipe takes about 1-1.5 hours to make and yields about 64 mini pretzels.

Pretzels and Cheese Sauce Recipe (by Smells Like Home):

For the pretzels

1 1/2 cups warm water (105-115 degrees F)

1 tbsp. sugar

2 tsp. salt

2 1/4 tsp. yeast

4 1/2 cups flour

4 tbsp. melted butter

2/3 cup baking soda (yes, you read that right)

10 cups water

Large granule salt

For the cheese sauce

2 tbsp. butter

2 tbsp. flour

1 cup milk

2 cups shredded cheddar cheese

salt, to taste (optional)

Directions:

1. To make the pretzels: In the bowl of a stand mixer fitted with the paddle attachment, mix together the water, sugar, yeast, and salt on low speed for 10 seconds. Switch to the dough hook and add the flour and 2 tbsp. butter (set the other 2 tbsp. aside). Mix on low speed until well combined. Change to medium speed and knead until the dough is smooth and pulls away from the side of the bowl. Remove the dough from the bowl and transfer it to a well-oiled bowl. Cover the bowl with a damp towel and set it in a warm place for 50-55 minutes, until the dough has doubled in size.

2. Preheat the oven to 425 degrees F. Line 2 large baking sheets with parchment paper. Set aside.

3. Bring the 10 cups of water and the baking soda to a rolling boil in an wide 8-quart saucepan or roasting pan.

4. In the meantime, turn the dough out onto a floured surface and divide into 8 equal pieces. Roll out each piece of dough into a 24-inch rope. Slice each rope into 1 1/2-inch pieces.

5. Using a slotted spoon lower a handful of the pretzel pieces into the boiling water and boil them for 30 seconds, flipping them around in the water with the spoon a couple of times. Remove the pretzel pieces from the water using the spoon, and place them on the baking sheets. Brush the top of each pretzel with the other 2 tbsp. melted butter and sprinkle with the large granule salt. Bake 10-12 minutes, until golden brown.

6. To make the cheese sauce: In a small saucepan set over medium heat, melt the butter. Whisk in the flour and cook for 30 seconds, whisking constantly.

7. Slowly whisk in the milk until no lumps of flour remain. Stirring constantly, bring the milk to a simmer over medium-low heat until it thickens (this happens quickly, so KEEP STIRRING). Stir in the shredded cheese until all of the cheese has melted.  Remove from the stove and add a pinch of salt, if needed.

8. Serve warm. Enjoy this crowd pleaser! :)

Monkey Bread Recipe

Monkey Bread Recipe

Monkey Bread Recipe

Monkey Bread Recipe

Monkey Bread Recipe

Monkey Bread Recipe

Monkey Bread Recipe

Even though school is over, it’s fun to look back at my year- and this year, I had an especially concentrated amount of fun in the Astronomy Club that I started at school. I think this is largely because the moderator of said club is wonderful to work with. Let’s just say that he is tied for my favorite teacher award (along with my english teacher this year and biology teacher last year. All were/are phenomenal and so great!!!!!).  I associate him with fun and continue to get entertainment out of him despite that I don’t have him as a teacher any more. Even just a little while ago, I was anonymously razzing him. First, though, let me rewind: Like most teachers, he hs his special mannerisms.One of his mannerisms is most apparent when he writes on the chalkboard; you can hear it through the wall on the other side, a sort of tap taptap tipptap tap taptap… TAP! TAP! TAP! It sounds like he really enjoys writing on the chalkboard. Some days, his writing is louder than others. So to continue, my english class is just through the wall from his class. Even to go from the door of my english teacher’s classroom to his classroom, you literally can walk two feet, and you’ll be in his classroom  (since both rooms sit on the corner of the hallway). One day, in english, the tapping seemed especially loud, so my teacher stopped class, and we sat there, silently listening to the taps for a full minute. Finally, I smiled and said, “Tap back.”  We did so obnoxiously. Well, the tapping on his side stopped, and we continued on with class. Little did we know, payback was coming. No one saw or heard him come into the english room, so when he spoke, nearly every girl in the room leapt up and screamed. What can I say? It was startling! Even better, though, one of my best friends was in his class at the time. Apparently, when he heard us tapping back, he stopped his class, saying, “Stahhp it! …Well, it’s kind of cute…”. Now I must emphasize. This is important. He only says something is cute if he really likes it. Usually he tends to call formulas “cute little tricks”. He still doesn’t know who initiated it, though. MWAHAHAHAHA!

I’m sorry, but I have another good story. Although, maybe I just like these stories because I know the teachers and all their mannerisms like the back of my hand. Sometimes, I’ll cross paths with my biology teacher from last year when I get picked up from school. Anyway, one of the spirit week themes was “uniform violation,” so I wore a shirt that only seniors can wear (radical, I know). Well, I crossed paths with my Biology teacher again, and he absolutely freaked out. Keeping in mind that he is about 30-something  years old and had me last year as his freshman student, he exclaims, “What??? Are you a Senior already?” I shook my head, and he heaved a huge sigh of relief. “Oh, thank goodness! You nearly gave me a heart attack! I was going to feel really depressed at how old I’m getting..”  Him. Old. Yeah right.

Alrighty, then… this recipe. Is. Delicious. You. Must. Make. It. ASAP! Seriously, it is really good! It’s very gooey and soft, and a total comfort food. It’s best to eat it right out of the oven, once it’s cooled down enough to be able to pull off parts with your fingers, yet still nice and warm. You can imagine why this one’s popular in the winter! :)

Monkey Bread Recipe:

2 cans Pillsbury rolls

cinnamon sugar (unspecified amount)

1 cup brown sugar

1/2 cup (1 stick) butter

Directions:

1. Preheat the oven to 375 degrees and lightly grease a bundt pan.

2. Cut each Pillsbury roll into 4 pieces, and roll each piece in the cinnamon sugar. Then, put the pieces in the prepared bundt pan.

3. Melt the butter, and add the brown sugar, stirring until thoroughly mixed. Pour over the biscuit pieces.

4. Bake for 20-25 minutes, until browned. Invert immediately on a platter. (Very important!)

5. Feast!

Orange Chicken Recipe

Orange Chicken Recipe

Orange Chicken Recipe

Orange Chicken Recipe

Orange Chicken Recipe

I was so sure that I would never branch out with this blog. I thought to myself when I started it, “I will only bake things sweet for this.” Well, I’ve discovered that I like a little more variety and experience to add to my culinary practices! That being said, you can expect a bit more of a variety from me this year- desserts, breakfasts, dinners, appetizers, breads, sided dishes, anything. And yes, I mean to keep up with this blog all year! :) I’m hoping to post about once a week, so as not to abandon you all! I was scrolling through my drafted posts, and I was absolutely appalled. There is a recipe that has been in my drafts for two years… Oops. I figured I should get a little better about keeping up with this thing! And summer is a great time to kick back into gear.

Well, I’m now a junior in high school. It is a bit weird to me… I’m halfway done? I feel like I’ve only just started high school, and yet, I also feel like I’ve been going there for a century. It felt long during the year, but now I’m just sitting here thinking “I want to be a freshman…” But, joking aside, I am so excited for Junior year! And SENIOR YEAR! I arranged my schedule such that I’ll have all my favorite teachers senior year, which I am very excited about! Even though I know the courses will be hard, I know I’ll have a blast in all my classes senior year. But not to forget about Junior year. Just a little nervous about taking physics. The rest I should be able to handle. Also, I’ll be taking a class on Shakespeare, and another class on Bioethics, which should prove interesting. The funny thing is, freshman year, my friends thought it was humorous how I planned to spend freshman and sophomore year doing all the required classes, leaving no room for electives. But now the tables have turned, because almost half my schedule can now be filled with electives, where my friends are now wishing that they’d gotten phys ed and computer apps over with (smug smile). My schedule came with its own complications, though. I made my schedule, turned it in, changed it, turned it in again, changed it again, turned it in for the third time, and was told that I should consider changing it one more time. Like I said. It came with a few complications. :)

Now that I have finished writing that novel, I suppose I should mention the recipe. I highly recommend it, as usual! The chicken is crisp and saucy, sweet, and tangy. It goes nicely over rice, and it a pretty good stand alone meal, though fruit and/or veggies go well with it too. Putting some sugar snap peas or snow peas in can even be good in this recipe. It’s pretty versatile, and pleasing to the taste buds. :) It’s not difficult or too time consuming, either, as many Chinese chicken recipes can be… it took me 25 minutes to make, and it’s a new family favorite! Overall, you can’t go wrong with this one.

Note: This recipe takes 25 minutes to make and yields 4 servings.

Orange Chicken Recipe (by Gimme Some Oven):

For the chicken

2 lbs chicken breasts, cut into bite sized pieces

salt and pepper (to taste)

2 tbsp. olive oil

For the sauce

1 tsp. garlic powder

1/2 cup orange juice

1/2 cup honey

1/3 cup soy sauce

1/4 cup vinegar

3 tbsp. cornstarch

1/2 tsp. ground ginger

1/2 tsp. pepper

zest from one orange

a pinch or crushed red pepper flakes

4 servings rice, prepared as directed on the box

For the Toppings (optional but recommended)

Green onions, chopped

Orange zest

Sesame seeds

Directions:

1. Set out a frying pan and heat the olive oil over medium-high heat. Add all the chicken, and add salt and pepper generously. Saute chicken until it is browned and cooked thoroughly.

2. For the sauce, whisk all the ingredients together until thoroughly blended. When the chicken is done, pour the sauce into the frying pan and stir continuously until the sauce thickens, about 1-2 minutes.

3. Serve over rice and top with chopped green onions, orange zest, and sesame seed as desired.

4.  Eat well and prosper!

Magic Cake (Custard Cake) Recipe

Magic Cake (Custard Cake) Recipe

Magic Cake (Custard Cake) Recipe

Magic Cake (Custard Cake) Recipe

Magic Cake (Custard Cake) Recipe

Before I say anything else, I must apologize for the pictures. It’s a little tricky to see the layers, but believe me… they’re there. They are also kind of blurry and the lighting is weird so… I guess you just have to make it yourself to see what it really looks like! I don’t think that this one deserves its name. I mean sure, it tastes like magic, but it was supposed to be “woo, look! The batter divided into three layers! How fascinating!” No. We all know that things that are less dense float and things that are more dense sink. Mind blown (not). It’s just funny. Anyway, this recipe should be called Custard Cake, in my opinion. BUT, I kept it with the name “Magic Cake” because that is the name by which it is most commonly known…

Anyway, this is a really good dessert! It is a very smooth consistency and quite creamy. And, as I mentioned, it becomes layered when it settles during the time that it bakes. The top is basically a meringue, the center is more of the custard part, and the bottom is the crust. It is more like a pudding and less like a cake, so don’t let the name deceive you. :)

Well, I realized just a few moments ago that I haven’t posted anything since summer break. I have had quite a few other things occupying my time, to be sure: a wedding, school, extracurricular activities, etc. (by the way, I did not get the home room I was hoping for, if you read the last post, although I still really like the one I am in, which I did not expect). To get to the point, sorry for the long delay between posts. In fact, today I was doing my homework, and I finally just threw my hands up and said “I’m doing this later.” That’s me with math. I get it, but whenever I come across one problem that I can’t solve, I obsess over it for a couple of hours until I either solve it or rip my hair out in the process. Overall though, it is going well. It’s do-able. Mostly,  it’s just weird to see the freshman. Aside from school, I have also been practicing for a musical that just showed and will be showing again this weekend. It is really fun, even though I am really bad at dancing. You may laugh at me and say that it’s not true, but it is, trust me. Proof: At one point, I faced planted on stage. To be honest, I was surprised that I wasn’t even embarrassed I just started to laugh (luckily, I don’t think anyone even noticed since I was in the background at the time).

I don’t know if I have ever really mentioned it on my blog, but I really like to write stories. I am especially enthusiastic about it right now because I had a major brainstorm over the summer (I am pretty sure that I am incapable of being creative during the school year when my brain is stuffed with math and chemistry). Anyway, I won’t give the details because, well… You can say I’m a dreamer, but I really want to get a couple of books published someday. I have a lot of ideas floating around in my head, and all that it would take to assemble them into a book would be some free time (as in after college). You see, in the summer, the first month of summer is spent reveling in the triumph of not having to write and essay or anything else. The second month is spent doing summery things like vacation, family reunions, etc., that take up lots of time. The last two weeks are the time where I write like crazy and then school hits and I stop writing things that aren’t essays and notes. Then summer comes again and the cycle continues. :) At any rate, I wrote a several hundred page book a few years ago, but the trouble is that by the time I get to the end, my writing has improved (which is good), but then I have to redo the beginning because it stinks. And when I redo the beginning, then the beginning and the end are good, but the middle stinks. So, I have just learned to rewrite the whole thing. But then after I rewrite the whole thing, my writing has improved, and I am back where I started. To get to the point, I have been working on the same story for about three years. I really want to finish it, but I keep coming up with new things to add to it. Also… I never realized how much I did it, but I really base a lot of my characters and setting off of real life people and places. One funny thing that happened to me this summer was when I went hiking at Isle Royale for a week with my sister and dad. There was a hiker there that we saw a couple of times and he is now a character in one of my books because he looked very much like the perfect person to “play the role.” It’s like casting people in a movie, except the actors don’t know that they’re in the movie.  Maybe I’m just flat-out weird, but I must say… isn’t it strange to think that we can impact some people just by existing?

Magic Cake (Custard Bars) Recipe (by Jo Cooks):

4 eggs, separated (yolks from whites)

1 tsp vanilla extract

3/4 cup sugar

1 stick (½ cup) butter, melted

¾ cup of all-purpose flour

2 cups milk (1% or better. No skim.)

powdered sugar for dusting cake

Directions:

1. Preheat oven to 325 degrees. Grease a 8 inch x 8 inch baking dish.

2. Separate eggs and add the egg whites to a mixer; mix until egg whites are stiff. Place egg whites in a bowl and set aside.

3. Beat the egg yolks with the sugar until light. Add butter and vanilla extract and continue beating for another minute or two after which you can add the flour and mix it in until fully incorporated.

4. Slowly start adding the milk and beat until everything is well mixed together. Add the egg whites, a third at a time and gently fold them in using a spatula, repeat until all egg whites are folded in.

5. Pour batter into baking dish and bake for 40-70 minutes or until the top is lightly golden. Note: the baking time could vary greatly depending on the oven, so take a peek at around 40 minutes and see how it looks.
6. Sprinkle some powdered sugar after cake has cooled.
7. Enjoy!

Cookie Dough Pie Recipe

Cookie Dough Pie Recipe

Cookie Dough Pie Recipe

Cookie Dough Pie Recipe

Cookie Dough Pie Recipe

So… if you haven’t figured it out be now, I should tell you the obvious. I love cookie dough and cream cheese. Anything with those two, for me, is bound to be wonderful. This jolly ol’ recipe happens to have BOTH. I know, it’s evil wonderful!!! It is also good for anyone who likes ice cream. It has a bit of a similarity in that it is cold and creamy :) at any rate, as I already mentioned, this pie is creamy, chocolatey, cookie doughy, has a nice Oreo crunchy crust, and is an overall winner. It is also quite rich and, I must admit, a little difficult to get a clean cut piece because the crust is tricky to cut neatly.

I cannot believe that summer is almost over. I feel as if it has just begun! Recently someone asked me if  my summer felt long (because it was also quite busy). I shook my head vigorously and said “noooooo!!!” A little while ago, I was leafing through my planner where I, throughout the school year, I had written down due dates, homework, and tests that I needed to study for. Not to sound snobby or anything, but I am amazed at what I managed to fit into a twenty-four hour day without going insane or dying! That being said, I really loved my freshman year and am looking forward to my sophomore year, which will start in eleven days. Crazy. It is strange how time works. During the school year, it seems slow. At times when it is at a crawl, I think to myself, “At some point, I won’t care what the heck I am doing right now. I won’t care about this upcoming history test when I turn 20. Or 30. Or 40. Or 90.” Well, I realize how much time files when I recognize that the time I was thinking of arrives hand in hand with summer. Already, I could care less about the test over the industrial revolution, the quiz over photosynthesis and cellular respiration, and the 44 slide presentation about Mark Twain that was 200 points (to put this in perspective, my exam was worth 100 points. Anything wrong with that picture???). At one point, I also had a quiz over a quiz. Again: anything wrong with that picture???

Seriously, though, I am super excited for this year! I am going to be in a musical, and continuing with the Astronomy Club that I created. I will also be continuing in a number of other clubs I was in last year. I’ll continue taking piano lessons, and I have many weddings to look forward to in my family! <3 :) I also love to anticipate and guess who will be my teachers this year. I have not gotten my schedule yet, but I am pretty sure I know who my teachers will be. The only thing I am not sure of is homeroom, and I have one that I hope to be put in. If I get into that one, I think I will scream out loud. If I don’t, I will still scream out loud.

P.S. I promise that I don’t talk about school 24/7… It just that, well… It’s immanent. Beware.

Cookie Dough Pie Recipe (from Life, Love and Sugar):

For the Crust:

20-25 oreos

5 Tbsp. butter, melted

For the Cookie Dough:

6 tbsp butter

1/3 cup dark brown sugar

1/8 cup sugar

1 tsp vanilla extract

1 cup flour

1 tsp milk

1/3 cup semisweet chocolate chips

For the Filling:

8 oz cream cheese

1/4 cup white sugar

1/4 cup dark brown sugar

8 oz cool whip

1/2 cup semisweet chocolate chips, divided
Directions:

For the pie crust:

1. Crush the oreos into a fine crumb and mix the oreo crumbs with the melted butter.

2. Press into the bottom of a greased 8 or 9 inch pie pan. Set in the freezer while you make the cookie dough.

For the Cookie Dough:

1. Cream the butter, sugar and dark brown sugar. Mix in the vanilla extract. Add the flour and milk and mix thoroughly. The dough will be thick. Last but not least, mix in the chocolate chips.

2. Roll the dough into little balls that are similar in diameter to a nickel.  Freeze the balls of dough while making the filling.

For the Filling:

1. Mix the cream cheese, sugar and brown sugar together with a mixer. Mix until smooth. Carefully and thoroughly fold in the Cool Whip. Stir in a 1/4 cup of chocolate chips and about 3/4 of the frozen cookie dough balls.

2. Pour the filling into the pie crust and top with remaining cookie dough balls and 1/4 cup of chocolate chips.

3. Allow to freeze completely. Set the pie on the counter 5 min before serving (it may be tricky to get the first piece out, but after that, it’s easy as pie :)

4. Enjoy the major comfort food!

Pear Crescent Cookies (Rugalach) Recipe

Pear Crescents (Rugalach) Recipe

Pear Crescents (Rugalach) Recipe

Pear Crescents (Rugalach) Recipe

Pear Crescents (Rugalach) Recipe

Pear Crescents (Rugalach) Recipe

Pear Crescents (Rugalach) Recipe

Pear Crescents (Rugalach) Recipe

Pear Crescents (Rugalach) Recipe

When my sister tasted these she said “Oh, wow. They’re like little pies! Geez, they’re so good!” She was eating them before dinner, as was I (naughty, naughty). She was spot on with her comment, except for when she added that they looked somewhat like caterpillars :) Anyway, these cookies really are like miniature pies. The actual crescent is  very pastry-like and the cream cheese in it is another interesting addition that makes it softer. I don’t quite know how to put it, but the cream cheese adds somewhat of a “gentleness” to the taste of the cookie. Maybe it’s just that hint of creaminess that makes it to pleasant to me. :) At any rate, the filling is good too. There is also cream cheese in the filling, along with pears, and I LOVE LOVE LOVE LOVE LOVE LOVE LOVE LOVE LOVE (etc.) pears!!!!

These are not as hard as they look. I’m just putting that out there. There is no cutting butter in for the crescents or weird things that need to be this temperature or dough that needs to be refrigerated. NO. This was one of those recipes that I saw and laughed at when I read the directions. It had all these things that were so complicated, and I knew that it wouldn’t affect the outcome (a.k.a. the cookies’ appearance or taste). Sometimes I get a good kick out of the things that recipes will direct you to do. Needless to say, I wouldn’t usually recommend skipping directions.

Ah. Do you ever wish that days were actually 36 hours long instead of 24 hours long? That’s me right now. I wrote most of this post at 1:30 a.m., so I was desperate for a longer day. It’s not uncommon for me to be up until one or two o’clock in the morning. Of course, then I sleep late, too. I’m no early bird, noooooo sireeeeeeeeeeee… I’m a late owl. My sister is usually my partner in crime in this department. Last summer, we stayed up until 2 o’clock almost every night. When I was really young (imagine me around age 6), I used to wonder how on earth my siblings could sleep for all eternity and HOW, OF ALL THINGS, could they ever want to got to bed?!?!?!?!?!? I understand now… all too well, I think. I’ve had some times this year when the only “equation” I could think of in math class was this: sleep+ infinity number of hours= heaven x life completion. I cannot tell you how many times I have told my sister that I wish I was Sleeping Beauty; not because I would be a princess (although it would be a plus), but because then I could sleep for 100 years on end. I still hold the records in my class for least amount of sleep and waking up the earliest… it’s a bittersweet accomplishment.

Pear c Cookies (Rugalach) Recipe (Adapted from Taste of Home):

(Makes one dozen)

1/2 cup butter, softened

1 package (8 ounces) cream cheese, divided

1 cups all-purpose flour

one dash of salt

1/2 cup finely diced pear (about one medium)

2 Tbsp. white sugar

1 teaspoons ground cinnamon

Directions:

1. Preheat the oven to 375 degrees and set out one ungreased cookie sheet.

2. In a large bowl, cream the butter and 4 oz. cream cheese until light and fluffy. Combine flour and salt; gradually add to creamed mixture and mix well. Combine sugar and cinnamon; set aside.

3. On a floured surface, roll out the dough into a 12-inch circle. Cut it into 12 wedges. In a small bowl, microwave the other 4 oz. cream cheese until it is easy to spread.Then, spread the cream cheese evenly on each wide end of the crescents. Sprinkle the prepared cinnamon sugar over each crescent evenly. Next, top each crescent with 1 teaspoon of pear (you won’t use the entire 1/2 cup diced pear, just FYI).

4. Roll up, beginning at wide end. Place pointed side down 2 inches apart on baking sheet; curve ends to form a crescent.

5. Bake for 12  minutes, no more. They might not look any different than when you put them in, but trust me… take them out after 12 minutes. If you flip one over, the bottom should be golden brown, or even a tad lighter is fine. Immediately remove to cool.

6. Enjoy! <3

Muffins Recipe (with variations for 20 different flavors)

Blueberry Muffins Recipe

Blueberry Muffins Recipe

Peach Muffins Recipe

Peach Muffins Recipe

Orange Chocolate Chip Muffins Recipe

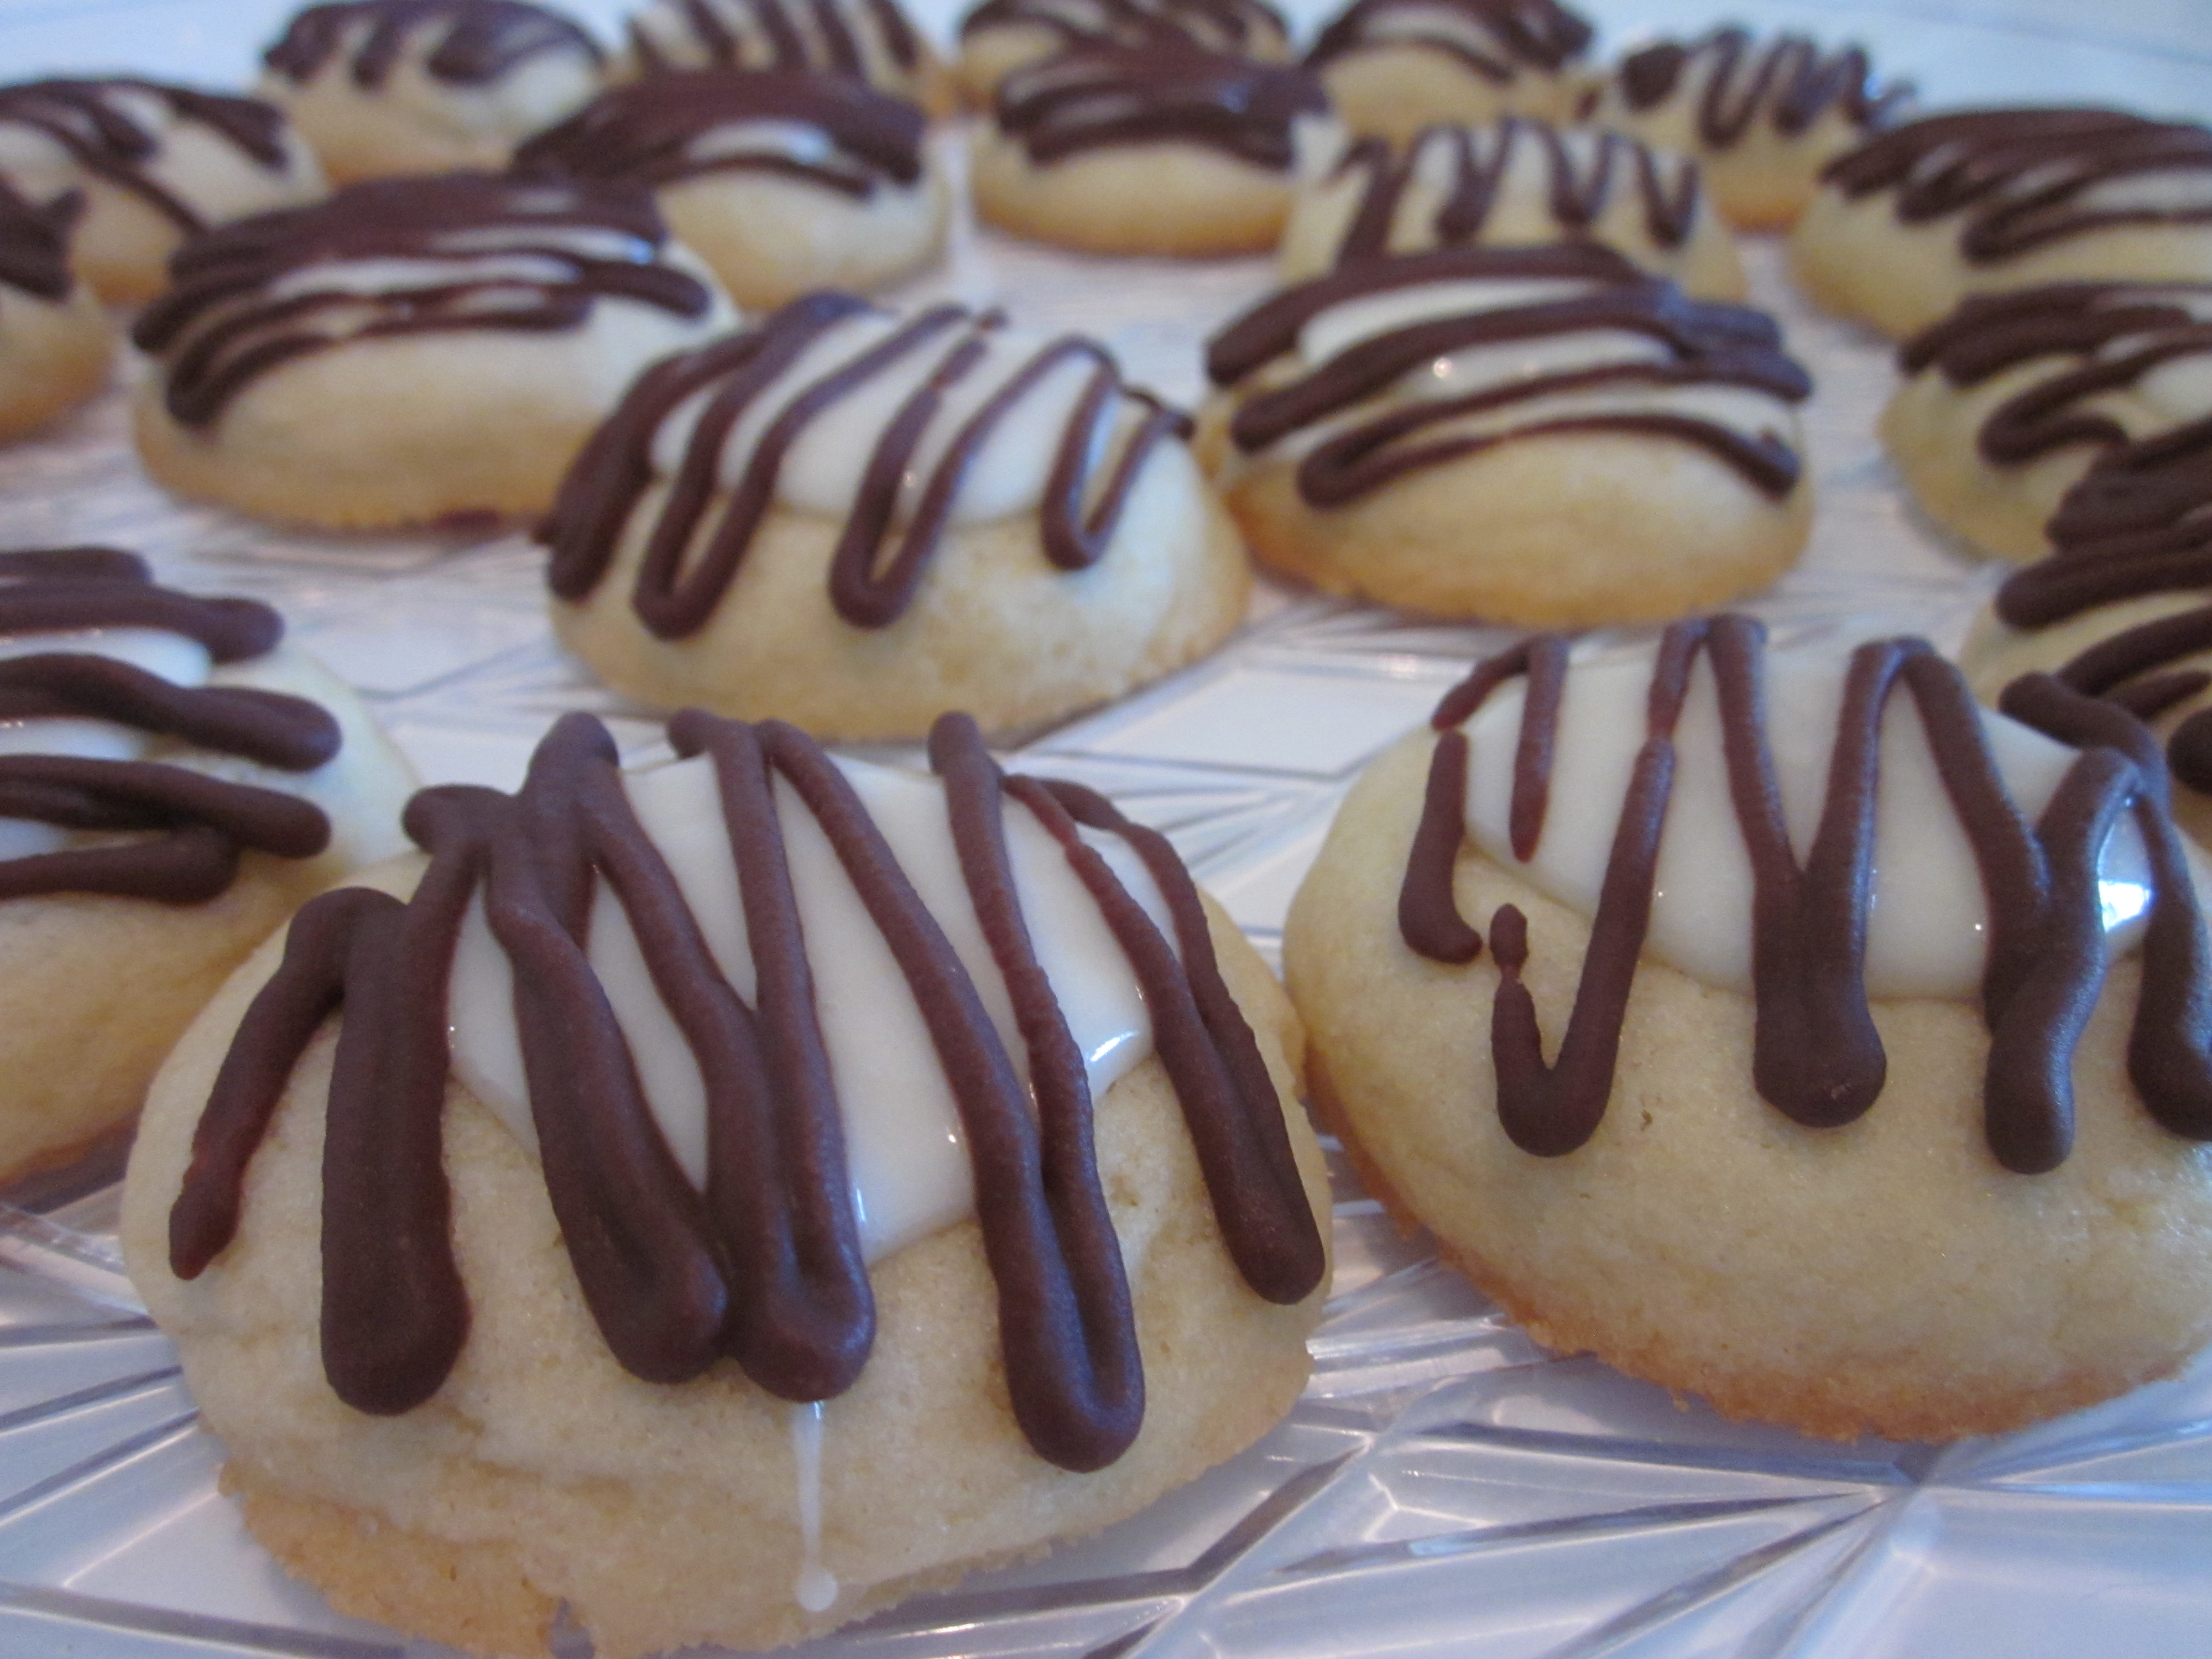
Orange Chocolate Chip Muffins Recipe (my brother was amusing himself with Scrabble pieces, if you didn’t notice…)

What with school and all, I kept the baking pretty brief. Short and sweet. Literally, sweet. Anyway, muffins are always reliably easy, right? So that’s what I have been making for the past year of my life. Muffins. Oh, the adventures (note the sarcasm). It’s not that I don’t enjoy making muffins, it’s just that I need some time consuming projects every once in a while to quench my constant desire to bake something, ANYTHING. For example, the gingerbread house that I made at Christmas… That put me out of commission for a while!

Anyway, as you can imagine, eating blueberry muffins everyday can get kind of boring. One advantage of that boredom, though, is that I discovered a million different combos and flavors, as well as tweeked the recipe so that the muffins are always very moist, but not simultaneously dry and gooey. There’s a fine line, and I could never seem to find that line until I changed the recipe for the more awesome. :) But like I said, I have the base of the muffin recipe below and you can look under the Note: at the bottom of the post to find the flavor(s) that are a calling your name. Abut the actual muffin base, though… After my modifications, I feel confidant that it is a great one! As I already mentioned, it is perfectly moist (neither gooey nor dry), soft, fluffy, light, and pleasantly sweet (but not sweet to the point of becoming a cupcake).

I’m going through summertime guilt right now. I have summer homework to do, but I keep procrastinating, which is new for me. It just sits on my bedside table, reminding me that I should be doing it, and me stubbornly not wanting to do it. To be honest, there are many things that I want to do (like blog more often!!! I hadn’t realized that my last post was at the beginning of the summer- it feels like I just posted it a week ago!). However, I keep just enjoying, well… stuff. Mostly I’ve been playing the piano (I’m trying to make up for all the lack of practice throughout the school year), reading, training, helping around the homestead, and baking. Also, my brother reminded me to start practicing Mario Kart before he came home so that he would have a good competitor, so I’ve been doing a little bit of that too. :) I hope you all are having a great summer so far, too. More to come, I promise! I just need to put my “butt-eth to the seat-eth” as my sister once told me.

Muffins Recipe (adapted from Betty Crocker):

2 eggs

1/2 cup vegetable oil

12 oz. vanilla yogurt

1/4 cup milk

2 cups flour

1/3 cup sugar

1 Tbsp. baking powder

1 tsp. salt

1 tsp. vanilla

turbinado sugar for sprinkling (Optional)

Directions:

1. Preheat the oven to 350 degrees and set out two muffins tins (each holding six) or one muffins tin (that holds twelve). Line the tins with paper cups.

2. Mix all of the dry ingredients together. Add all of the wet ingredients together, and then mix. (Do not add some dry and then some wet ingredients. You may think that it won’t make a difference, but it does. Unless you want lumpy muffins, of course, be my guest.)

3. See the note below if you want a unique flavor! Change the recipe according to the directions given below for the flavor you want. Then simply fill the paper cups 3/4 way full and sprinkle them with turbinado sugar.  and bake the muffins for 15-20 minutes or until a toothpick comes out clean.

4. Take the muffins out of the pan immediately!!! Allow them to cool a little before serving warm.

5. Go, fight, win!

Note:

Flavors (alphabetical order):

1. Apple cider– substitute apple cider for the milk and add 1/3 cup applesauce. Mix these two ingredients into the muffins with the wet ingredients. Continue as instructed.

2. Apple cinnamon-Add 1 tsp. of cinnamon with the dry ingredients. Next, add 1/2 cup applesauce and 1/2 cup chopped applesauce with the wet ingredients. Continue as instructed.

3. Blueberry– add 1 cup fresh or frozen blueberries after all of the ingredients have been mixed together. Continue as instructed.

4. Blueberry lemon/orange-substitute the milk for 1/4 cup orange juice or lemon juice. Add the latter juice with the wet ingredients. Add 1 cup blueberries after all of the ingredients have been mixed. Continue as instructed.

5. Blueberry/Strawberry cinnamon– add 1 tsp. of cinnamon with the dry ingredients. After all of the ingredients have been mixed, add 1 cup of fresh or frozen blueberries or 1 cup of chopped, fresh strawberries. Continue as instructed.

6. Butter pecan– after all of the ingredients have been mixed, add 1/2 cup chopped pecans. Bake as instructed. Immediately remove the muffins from the pan and roll them in melted butter. Allow to cool and eat!

7. Cherry almond– add 1/2 tsp. almond extract with the wt ingredients and add 1 cup dried cherries. Continue as instructed.

8. Chocolate chip– after all of the ingredient been mixed, add 1 cup chocolate chips. Continue as instructed.

9. Cinnamon chip– after all of the ingredients have been mixed, add 1 cup cinnamon chips (Hershey’s is the brand). Continue as instructed.

10. Coconut pineapple– substitute the milk for pineapple juice (mix it in with the wet ingredients). After all of the ingredients have been mixed, add 1 cup coconut. Continue as instructed.

11. Eggnog– substitute the yogurt and milk for 3/4 cup eggnog. Continue as instructed.

12. Lemon poppyseed– substitute the milk for 1/4 cup lemon juice. Add 1 tbsp. poppy seeds. Continue as instructed.

13. Oatmeal raisin– add 1 cup oatmeal and 1/2 cup raisins with the dry ingredients. Continue as instructed.

14.  Orange chocolate chip– add 2 tbsp. orange extract or substitute the milk for orange juice (mix with the wet ingredients). Next, mix in 1 cup chocolate chips. Continue as instructed.

15. Peach– add 1 cup chopped peaches with the wet ingredients… Before baking, sprinkle the tops of the muffins batter with cinnamon along with the turbinado sugar. Bake as instructed.

16. Pumpkin– (click here for recipe)

17. Raspberry (lemon)– for raspberry lemon, add 2 tbsp. lemon juice with the wet ingredients. Increase the sugar to 1/2 cup. After all of the ingredients have been mixed, GENTLY fold 1 cup of raspberries into the batter (this is important, otherwise you will end up with purple muffins. This is a voice of experience talking… ).  Continue as instructed.

18. Rhubarb– increase the sugar to 1/2 cup. Add 1 cup chopped rhubarb. Continue as instructed.

19. Strawberry– add 1 cup fresh, chopped strawberries. Continue as instructed.

20. Strawberry Pretzel– add 1 cup fresh, chopped strawberries. Spoon the batter into the cups as instructed and set aside (do not bake, yet). In a separate bowl, melt 1/4 cup butter and mix in 2 tbsp. sugar. Add 1/2 cup crushed pretzels. Sprinkle this topping over the batter in the cups. Gently press it into the muffin, but don’t mix it in. It should still be on the top. Bake as instructed.

Lemon Chiffon Cake Recipe

Lemon Chiffon Cake Recipe

Lemon Chiffon Cake Recipe

Lemon Chiffon Cake Recipe

Lemon Chiffon Cake Recipe

At last I post a recipe. On summer break, too!!! (I am 25% of the way done with high school!) I would have posted something over spring break, but I had just about had enough writing for my taste. And that is saying something, since I love to write. The Thursday before spring break started, I was already pretty revved up. I was doing everything that I usually do when I get home from school and then I saw my brother outside, flying a make-shift kite. I decided to do homework later. If you know me, you’ll have a laugh when you picture the scene that I am about to describe. I went outside in my pajama pants  and baggy grey t-shirt to play basketball and fly a kite made out of computer paper. Not to mention that I am horrible at basketball and probably couldn’t make a basket if my life depended on it. Alright, that’s a lie, but don’t ever get it in your head that I actually get the ball in the basket when I say that I played basketball. It’s more like steal the ball and keep it. Don’t let anyone else steal it. Dribble. Miss the hoop. Get the ball before the other person does. That’s how I play basketball. But I needed it at any rate. It was a beautiful day, and I could not let one more go to waste as I sit cooped up inside, doing homework. I love high school, but I despise homework. Story of every teen’s life.

So, my review of freshman year. Loved it. I really did. As I mentioned, I did not like the homework, but the things is… when I look back at the past year, I think about my friends and my teachers a whole lot more than the homework (although, when I came across some to-do lists from throughout the year, I cringe, thinking “Yeah, I remember that…”). I had some good laughs and embarrassing moments, like getting a pencil stuck in my hair in math class. I couldn’t get it out so I had to ask someone to get it out for me. At that point, math class had stopped, watching me struggle to get this pencil out of my hair.  I’m a graceful person like that. :) Other times, people have found that I am fun to tease. One of my teachers especially found it hilarious when he asked me if I was ready for a quiz that he had never mentioned. He would say that he was joking after I freaked out and panicked. But enough about school, I want to talk about SUMMER!!!!!!!!!!!!!!!! I am trying to get back into the groove of blogging and baking, but there are so many things that I want to do, now that I have the time. I just can’t get over it.

Here is my review of this recipe: Summer on a plate. I imagine that you probably have had angel food cake. If so, you know what the texture of this cake is like. Very light and fluffy. In addition to its light texture, it is the perfect balance between sweet and tangy. The frosting adds a nice buttery touch as well. The fresh lemon has a nice strong flavor and is, as lemon tends to be, very… well, let us just say that I think lemon starts fireworks in the mouth when it is fresh. If it’s from a bottle, then it tends to have a weird aftertaste, so I don’t recommend bottled lemon juice for this recipe. Lemon is the main event, don’t spoil it! Putting bottled lemon juice in this cake is equivalent to putting brown wax into your cookies rather than chocolate chips. Technically, it works. But it certainly does not taste the same.

Lemon Chiffon Cake Recipe (adapted from Taste of Home):

For the Cake:

7 eggs, separated

2 cups all-purpose flour

1-1/2 cups sugar

3 teaspoons baking powder

1 teaspoon salt

3/4 cup water

1/2 cup canola oil

4 teaspoons grated lemon peel

2 teaspoons vanilla extract

1/2 teaspoon cream of tartar

For the Frosting:

1/3 cup butter, softened

3 cups confectioners’ sugar

1/4 cup lemon juice

4-1/2 teaspoons grated lemon peel

Dash salt

Directions:

1. Preheat the oven to 325° and set out an ungreased 10 inch tube pan.

2. In a large bowl, combine flour, sugar, baking powder and salt. In another bowl, whisk the egg yolks, water, oil, lemon peel and vanilla; add to dry ingredients and beat until well blended. Add cream of tartar to egg whites; beat on medium speed until stiff peaks form. Gently fold the egg whites into the batter.

3. Carefully spoon the batter into the tube pan and cut through batter with a knife to remove air pockets. Make sure that the batter is evenly distributed and smooth on the surface, otherwise you will have a deformed cake on your hands, and it will be more difficult to frost nicely.

4. Bake 50-55 minutes or until cake springs back when lightly touched. Run a knife around the edges and center of the tube pan before immediately inverting the pan to cool completely on a serving plate/platter/whatever.

4. In a small bowl, combine frosting ingredients; beat until smooth. Spread over top of cake, allowing frosting to drip down the sides.

5. ¿Que pasa, calabaza? Nada, nada, limonada!

Gingerbread House Bonus Post

MERRY CHRISTMAS!!!!!!!!!!!!!!!!!!!!!!!!!!!!!!!!!!!!!!!!! This is my Christmas Bonus Post in which I do not type a recipe (you can find a gingerbread house recipe anywhere, especially at this time of year. You can pretty much use whichever recipe you want). Anyway, this gingerbread house of mine was a several day long project. I knew when I started this, that despite any blood-sweat-and-tears, this house would be one for the books. I don’t even know what to say about it because I am sooo happy that it is done!!!!!! Cut me some slack if this is a boring post… You have no idea how  tedious this was to make the dough, bake all of  the little and big parts, make frosting, buy candy, and decorate it.

Another fun little detail is that I modeled this gingerbread house after the house that I call home. My dad got the blueprints that were used when the house was built. I felt very official to be using blueprints for a baking project. :)

in the making

in the making

in the making

in the making

my sister helping me

my sister helping me

my brother joking around

my brother joking around

the front final result

the front final result

the back final result

the back final result

chimney side final result

chimney side final result

the entryway side final result

the entryway side final result

my brother's gingerbread house that he sarcastically claimed was more grand... :)

my brother’s gingerbread house that he sarcastically claimed was more grand… :)

Pumpkin Pie Spiced White Hot Chocolate

Pumpkin Pie Spiced White Hot Chocolate Recipe

Pumpkin Pie Spiced White Hot Chocolate Recipe

Just kidding, of course :)

Just kidding, of course :)

Before I continue, I just have to say that I thought you might enjoy seeing the results of my fiddling around with the photos that I took of this fabulous recipe :) And I’m just kidding of course… don’t worry, when you make this one, it won’t look all weirdly contrasted, tinted, saturated, and brightened. Yeah… I had a good time with this photo.

Pumpkin Pie Spiced White Hot Chocolate: (n) a delicious, creamy beverage that sends one to heaven because it is so tasty, amazing, and unhealthy. Synonyms: none. Antonyms:  everything that is not Pumpkin Pie Spiced White Hot Chocolate. Okay, so that definition really condenses the meaning of this drink… it is the stairway to heaven. Alright, not literally, but you know what I mean. This drink really is so tasty, though. It is rich, creamy, sweet, white chocolate-y, and a total comfort food (I’ll warn you though, don’t drink too much of it, because it is heavy). Be sure that when you make this (yes, you WILL make this), you top it off with whipped cream and a sprinkle of Pumpkin Pie Spice. It adds a lot and is a very nice accent! If you need further convincing, then I will tell you that this is officially my mom’s favorite winter-time drink. Questions? NO? Of course not. I have taught you well. :D

WOW it feels great not to be writing a paper/essay i can do whatever i want to i can make any grammatical mistakes i want 2 mwahahaha!!!! No grading, nothing. You have no idea how happy that makes me. :) I mean, I love writing, but I usually like to write about adventure, action, romance, fiction in general, and, of course, recipes. Sorry for all the random comments, but I haven’t blogged for SOOO long and it feels great! I really miss blogging (not like I’ve been in school for very long, either… that’s the sad thing. But at least I’m only a few days away from 1/8 of the way done with high school!). I had no idea what I was going to say when I sat down to type this post (well, I confess, I sat down to write a paper), but my fingers just kind of took care of that part for me. “Yes, these are Katy’s fingers speaking. Hello. We’ve always wanted to say that. :) Hope to chat again later, but Katy’s brain is going to posses us again in a few seconds.”

Pumpkin Pie Spiced White Hot Chocolate Recipe (adapted from tatertots & jello):

1/2 cup of heavy whipping cream

2 1/2  cups of milk

1 cup white chocolate chips

1/2 teaspoon of pure vanilla extract

1/2 teaspoon of pumpkin spice

Whipped cream and additional pumpkin spice to sprinkle on top.

Directions:

1. Heat cream and milk in a pan over medium heat, stirring occasionally until very hot, but DO NOT boil it.

2. In a medium sized bowl, pour heated cream and milk over the white chocolate chips. Stir until chips are melted.

3. Add vanilla extract and pumpkin spice.

4. Pour into a mug for yourself and a friend. Top it with whipped cream and a sprinkle of pumpkin spice.

Note:

I’ve found that usually they melt most of the way but not completely. If that happens, just pour the milk/chocolate mixture back into the pot and heat it until the chocolate is done melting. Just be careful not to boil the drink or burn any of the chocolate to the bottom of the pan.

Blackberry Cream Pie Recipe

Blackberry Cream Pie Recipe

Blackberry Cream Pie Recipe

Blackberry Cream Pie Recipe

Blackberry Cream Pie Recipe

Blackberry Cream Pie Recipe

Blackberry Cream Pie Recipe

Who is lucky enough to have fresh blackberries? Anyone? I’m not counting Kroger’s blackberries or any blackberries from a store. Road side fruit, okay… well I have got to be the luckiest person of all. Wild blackberries are everywhere on my farm and this year we had a bumper crop of them. My family (excluding all of the lazy lumps:) goes blackberry picking annually and this year, more than ever,  we were completely decked out for whatever might come our way.  We’ve found that the bigger the berries, the bigger the thorns. So, we had over-sized carhart coats, carhart pants, boots, baseball caps, bug spray, leather gloves in case of poison ivy… you name it. :) I thought that it was exceedingly gratifying to tromp through the thorns and not be bothered by them in the least. Anyway, you might be wondering why my family and I make such a strategical strike when it comes to blackberry picking. The simple answer is this: often we use them to make wine or jam and any other sweet edible treats. So we want a lot of them.

I guess I should  apologize to those of you who have blackberry bushes as well, though, because I was late to get this recipe out. I meant to publish it during the blackberry season so that it could be used, but now the season is looooooong gone… oh well. Maybe you can just keep this recipe in in mind (I know what you’re thinking right now: “For a year? Sure, Katy… whatever.”) or you can experiment with other berries. Raspberries would probably work well. :)

As for how this recipe tastes… well isn’t the selling point that there are blackberries? Come on, that alone pretty much guarantees that it’s a good recipe! Okay so the berries give this pie SO MUCH FLAVOR! I love it! The custard is a very nice creamy complement to the berries and a crumb top is always a nice touch. Not to mention the crust that I usually use is, as always, flakey and buttery. So over all, this pie is bursting with the essence of summer!

Blackberry Cream Pie Recipe (from Rockin’ Robin’s Cooking Mexican Recipes):

For the Crust (from Betty Crocker):

1/3 cup butter

1 cup flour

1/2 tsp. salt

2-3 tbsp. water

For the Filling:

3 cups fresh blackberries

1 cup sugar

1/3 cup all purpose flour

1/8 teaspoon salt

2 eggs beaten

1/2 cup commercial sour cream

For the Topping:

1/2 cup sugar

1/2 cup all purpose flour

1/4 cup (1/2 stick) butter

Directions:

1. Preheat the oven to 350 degrees and set out one ungreased pie plate.

2. For the Crust: I sometimes cheat on this part and you can too if you want. I just throw the ingredients for the pie crust in my electric mixer and pulse the mixer, so as not to lose the flakiness of the crust (add the water 1 tbsp. at a time between pulses). If you don’t want to cheat, continue reading this step. Cut butter into flour and salt until particles are the size of small peas. Sprinkle in water, 1 tablespoon at a time, tossing with fork until all flour is moistened and pastry almost cleans the sides of the bowl.

3. Gather dough into a ball and roll it out on a lightly floured surface until the pastry is about two inches larger than inverted pie plate. Fold the pastry into quarters; ease into the plate and unfold. Then press it firmly against the bottom and side. Cut off any excess dough, leaving about one inch of dough hanging off of the pie plate’s lip. Fold the dough under and flute. Place 3 cups blackberries in pastry shell. Set aside.

4. For the Filling: Combine sugar, flour, and salt in medium bowl. In a separate bowl, stir the sour cream and egg together until smooth. Combine the flour mixture and the egg mixture and mix until smooth. Pour all of the filling over the blackberries in the pie plate.

5. For the Topping: Stir the flour and sugar together before cutting the butter into the flour sugar mixture. Using your (washed) hands or a pastry blender, mix until the topping is crumbly and coarse looking. Sprinkle the mixture over the filling and bake the pie for 50-55 minutes, until lightly browned.

6. Enjoy warm with a scoop of vanilla ice cream! (The ice cream complements the flavor of the berries really nicely for this recipe.)

Beer Bread Recipe

Beer Bread Recipe

Beer Bread Recipe

Beer Bread Recipe

Beer Bread Recipe

My sister stabbing the bread...

My sister stabbing the bread…

Whenever I think of beer bread, I think of a beautiful fall evening when my dad made a fire in our living room and my family sat down and watched the movie Mulan as we snarfed down some beer bread that my sister had made (I specifically remember her forgetting to put in the sugar). How’s that for a cozy memory? It seems both classic and comical to me. I have to say, though, the beer bread was still fabulous. :)

You’ll probably never see an easier bread recipe. This one is about as good as it gets!  The bread is very moist, flavorful, and unusual in that it.. well… has beer in it.  So (at least to me) it has a unique taste and I cannot imagine drinking something that has such a strong flavor that you can flavor a whole recipe with it. That must be one strong tasting beverage… anyway, it sounds odd doesn’t it? Beer bread? Well let me reassure you. IT IS NOT. It’s probably one of my favorite quick breads ever in existence (spare me from the teasing that I’ll get from that comment!!!).  Not only is it all that I said above, but the turbinado sugar makes the bread even better  when it adds its sweet crunch. It makes my mouth water just to think of it!

Beer Bread Recipe (from Lial Family Cookbook):

(makes one loaf)

3 cups flour

1 tbsp. baking powder

1 1/2 tsp. salt

1 cup sugar

1 (12 oz.) can warm bud light beer

Turbinado sugar for sprinkling

Directions:

1. Preheat the oven to 350 degrees and set out one greased 9x5x3 or 8 1/2×4 1/2×2 1/2 inch bread pan.

2. In a large bowl, mix all of the dry ingredients together. Pour in the beer and mix until thoroughly combined. Pour the batter into the pan and sprinkle well with turbinado sugar. Bake for 50-60 minutes or until an inserted knife comes out clean. Allow to cool to prefered temperature (I like mine warm).

3. Serve for breakfast, lunch, dinner, and to the cows that come home. :)

Apple Butter Whoopie Pies Recipe

Apple Butter Whoopie Pies Recipe

Apple Butter Whoopie Pies Recipe

Apple Butter Whoopie Pies Recipe

Apple Butter Whoopie Pies Recipe

Apple Butter Whoopie Pies Recipe

Apple Butter Whoopie Pies Recipe

You have to  trust me on this one- they’re not the prettiest cookies on the planer but they are SO GOOD! The apple butter gives the cookies their great and unusual (for a cookie) flavor. The apple flavor is gently and sweetly complemented by the butter-y brown sugar taste of the actual cookies. Oh yeah- this recipe has cream cheese!  I realized just a moment ago, after a quick calculation, that about 20% of my blog posts contain cream cheese. Sorry about that… I guess I just love cream cheese too much. :)

Anyway, my cousin came for a visit this weekend and she was very enthusiastic about making some things that I could post on my blog. So, she, my sister, and I baked three things to take pictures of and post and made one thing already on my blog. It was a baking frenzy and so much fun! And it just felt good to make something fall-ish. I’m SOOO excited for fall! Don’t get me wrong, I love summer, but fall is a good time of year too. The air is cool and crisp and the landscape seems to be bursting with color! That’s my personal heaven.  I’m not one for the heat. In the summer, I seem to become a nocturnal creature if it means avoiding heat.

Apple Butter Whoopie Pies (adapted from Mrs. Fields):

For the Cookies:

2 1/2 cups flour

1/2 tsp. baking soda

1/4 tsp. salt

1 cup brown sugar

1/2 cup white sugar

1 cup (2 sticks) butter, softened

2 eggs

2 tsp. vanilla

For the Filling:

1 1/2 pkgs. (12 oz.) cream cheese

1 cup powdered sugar

1/2 cup white sugar

1/2 cup apple butter

Directions:

1. Preheat the oven to 350 degrees and set out two ungreased cookie sheets.

2. In a bowl fitted to an electric mixer, cream the butter, white sugar, brown sugar, vanilla, and eggs together until smooth. Add the flour, baking soda, and salt and mix together on a low speed until just combined.  Be sure not to over mix the dough.

3.  Roll the dough into marble sized balls (or regular sized if you want. I do a mix) and bake for 10-12 minutes. DO NOT BROWN THE COOKIES. Allow them to cool for several minutes until they have firmed up and can be removed with a spatula.

4. In a medium bowl, beat all of the filling ingredients together until smooth. Refrigerate for 10 minutes if you think the filling is too runny.  Spread filling on the bottom of one cooled cookie and top with another cookie to create a sandwich. Repeat with the rest of the cookies. Refrigerate until served.

5. Serve on a nice fall day… or, in my case, any day of the year. :)

Yum Yum Cake Recipe

Yum Yum Cake Recipe

Yum Yum Cake Recipe

Yum Yum Cake Recipe

Yum Yum Cake Recipe

Yum Yum Cake Recipe

Yum Yum Cake Recipe

First off is the explanation of the vague name… my Mom re-named this cake many years ago when she had her arms full with toddlers. I remember looking through a cookbook and I saw the recipe. “Hey!” I thought. “This recipe looks the same as Yum Yum Cake.” Come to find out, I had discovered the cake’s original title. My eyes just about fell out of my head when I realized what it was really  called. WHAT???  I still much prefer to call it Yum Yum Cake and I’m sure that I always will. :)

Anyway… let me just say that this is not an unusual birthday cake request in my household. :) As soon as you look at the ingredients, you’ll know why too. Maybe it’s because this cake is decadent, gooey, crunchy, fluffy, and it hits you hard (all at the same time!).  Oh, and did I mention that it’s probably the easiest thing that you’ll ever make (yes, I’m ordering you to make it!)? There’s not a single thing that you have to measure because it’s all prepackaged. :)

I entered this recipe in the county fair this year. I’ve never done anything in the fair, really… so this year is a first. I wasn’t completely sure what to do, so I just kind of had to go with the flow. But I was feeling pretty confident that this cake would do well. I was happy when I found out that it got second place. :) My mom and I stayed for the auction and I had to laugh at her very uneconomical decision to buy the cake back. Apparently she wanted to hoard the glorious-ness of the cake for our family and she didn’t have the patience to wait for me to make a new one when we got home. :) You have to believe me when I say that I gave her a good tease about that!

Yum Yum Cake Recipe( from the Devil’s Food Cookbook):

1 box German Chocolate cake mix

1 (14 oz.) can sweetened condensed milk

1 (17 oz.) jar Mrs. Richardson’s Butterscotch Caramel Sauce

1 (8 oz.) container Cool Whip

1 (8 oz.) bag of Heath candy bits

Directions:

1. Prepare the German chocolate cake as directed on the box (bake in a 13×9 inch pan, not two round pans). After it has finished baking and cooled for a little while, use the end of a wooden spoon to poke many holes all over the cake (don’t be shy. No one will ever see the holes but you!) and pour the caramel sauce and sweetened condensed milk over the cake.

2. When you’re sure that the cake is COMPLETELY cooled, frost it with the Cool Whip. Sprinkle as much or as little of the Heath bits on top of the cake as you wish.

3. “We have a volunteer to serve the cake. Let  the yums begin… and may the calories be ever in your favor.”

– Katy’s adapted quote from The Hunger Games

Cream Cheese Thumbprint Cookies Recipe

Cream Cheese Thumbprint Cookies Recipe

Cream Cheese Thumbprint Cookies Recipe

Cream Cheese Thumbprint Cookies Recipe

Cream Cheese Thumbprint Cookies Recipe

This one was a package deal. Not only did I get to make some fun cookies, but I also got to enjoy a fun afternoon of going to a convenience store a few times. Literally, I went twice and I had fun both times. Alright, so here’s how it started off… when I decided to make these cookies  the other day and the time came for me to fill the cookies, I realized that I had no powdered sugar. So, I persuaded my sister to drive me to a convenience store roughly two minutes away. Let me tell you that that store has anything and everything. It has, many times, been a life saver for me because an essential or two ingredient ran out during the making of a new recipe. Many times, my family will debate if they carry something and resolve to calling them and finding out that, yes… of course they carry it. Anyway, my sister and I got some powdered sugar and brought it up to the register. The woman there was very friendly and asked me what I was making. I told her about the cookies. She laughed and jokingly asked us to drop a few off as she would be there for a little while yet.  When I got home, I finished making the cookies and smiled. My sister loaded a few cookies on a plate and we went back to the store to give her some cookies. :) Unfortunately, she wasn’t there anymore, but we asked someone to give them to her, along with one of my business cards. My sister and I were smiling for the rest of the afternoon. Some things just make me feel happy. :)

One thing that I had to laugh about with these cookies is that the directions said to drizzle the chocolate over the cookies. True, yes… but in the picture they had obviously piped the chocolate on. It was totally a “Hey look at this! This drizzle is perfectly round and beautiful! You can do it too!” Not without piping it on, no! No way! So instead I followed the directions that the picture gave me… I piped the chocolate on instead of drizzling it on. The other thing was that the directions were way way WAY overly complicated (it was really funny, actually). Anyway, the cookies were very good. The cookie is a butter-y shortbread base and the filling is… well… it’s cream cheese filling(!!!). If you’ve read any of my posts, then you know that that is an instant love for me! The chocolate was an excellent complement to the creamy filling and the cookies were, over-all, excellent treats. They were the perfect sweetness for a cookie and were very snack-able and snitch-able. :)

Cream Cheese Thumb Print Cookies (from TasteofHome Cookies):

For the Cookies:

2/3 cup butter

3/4 cup sugar

1 egg

1 tsp. vanilla extract

1 3/4 cups flour

1 tsp. baking powder

1/2 tsp. salt

For the Filling:

6 oz. cream cheese

1 1/2 cups powdered sugar

2 tbsp. flour

1 tsp. vanilla

For the Drizzle/Piping:

3/4 cup milk chocolate chips

3 tbsp. butter, softened or melted

Directions:

1. Preheat the oven to 375 degrees and set out two greased cookie sheets.

2. For the Cookies: In abowl fitted to an electric mixer, cream the butter and sugar together. Add the egg and vanilla and beat well until smooth. Slowly mix in the flour, baking powder, and salt until thoroughly combined. Roll the dough into tablespoon sized balls and flatten the balls slightly with the palm of your hand to make a fat disc. Bake the cookies for 8-10 minutes or until the edges of the cookies just start to turn golden brown. Remove the cookies from the oven and immediately make a large indent in the cookies with your thumb or make a thumb-sized indentation with the end of a wooden spoon handle.

3. For the Filling: In a medium bowl, mix the cream cheese, powdered sugar, vanilla, and flour together until smooth. Fill the cookies with about 1 or 2 tsp. of filling each.

4. For the Drizzle/Piping: In the microwave, melt the chocolate and stir until smooth. Add the butter and microwave a little bit more if it has to melt some more. Stir until well combined and drizzle or pipe the topping over the cookies.

5. Serve with a smile.

Rhubarb Custard Bars Recipe

Rhubarb Custard Bars Recipe

Rhubarb Custard Bars Recipe

Rhubarb Custard Bars Recipe

Rhubarb Custard Bars Recipe

Rhubarb Custard Bars Recipe

Rhubarb Custard Bars Recipe

I think that the past two days (July 24th and 25th) were the nicest summer days yet (at least in my area). There was a cool breeze, but  it was still pleasantly warm… the perfect combo! It was nice not to have one of those beastly hot days where I go outside and instantly feel like I was poached in my own sweat. Ick!!! We’ve also had plenty of rain, and let me tell you that I’m absolutely loving that! I think that one of my favorite things to do is to sit and watch a thunderstorm. They’re just so awesome!!! My favorite kind of thunderstorms are the ones where I look up toward the sky and I see those big, puffy, periwinkle-blue storm clouds ahead; then there’s a breeze, and best of all, the smell of rain. It’s probably the best smell ever to be in existence.

Alright, so I guess at this point you’re wondering if the weather talk ties in at all. Well, originally, I was going to say that the perfect summer day calls for the perfect summer dessert. :) I was never really looking for a recipe with rhubarb until I had a ton of leftover rhubarb from making pie. I literally had enough to make another  pie, but, of course, I didn’t want to wear out the eaters on rhubarb pie. :) So, I poked around and found this recipe in a cookbook that my Mom gave me last year. I had to give my mom a good tease because when I told her that I wanted to make these bars, she was very hesitant. She thought that no one would be able to taste the rhubarb, but she didn’t know that the recipe called for four cups of rhubarb… with that, everyone would be able to distinguish it’s great flavor! Well, when everyone dug in, she was the first one to say that the bars were fabulous. I totally agree with that statement. The crust is a butter-y shortbread and the creamy, flavorful, custard filling makes the whole thing delightfully gooey. The cream cheese frosting tasted great (how could it not? It has cream cheese!!!)  and was nice and fluffy. It was a nice finish to a perfect summer day!

Rhubarb Custard Bars Recipe (adapted from TasteofHome Cookies):

For the Crust:

2 cups flour

1/4 cup sugar

1 cup cold butter

For the Custard Filling:

2 cups sugar

7 tbsp. flour

1 cup vanilla yogurt

3 eggs

4 cups chopped rhubarb (about 1/2 inch pieces)

1 cup chopped strawberries

For the Frosting:

6 oz. cream cheese

1/2 cup sugar

1/2 tsp. vanilla extract

1 cup heavy whipping cream, whipped

Directions:

1. Preheat the oven to 350 degrees and set out one greased 13×9 inch pan.

2. For the Crust: Mix the flour and sugar together in a medium bowl. Cut in the butter and mix it with your hands until it is a course, crumbly mixture. Press the dough into the prepared 13×9 inch pan and bake it for 15 minutes before removing it from the oven. The dough will not appear golden brown or done baking at all, but definitely take it out after 15 minutes because it will bake some more later. :) There is no need to cool the crust.

3. For the Custard Filling: In a large bowl, combine the sugar, flour, yogurt, and eggs until smooth. Add the chopped rhubarb and strawberries and mix well. Gently pour it into the 13×9 inch pan, on top of the baked crust. Continue to bake the bars for 45 minutes or until the custard has set and the edges turn golden brown. Allow the pan to cool for half an hour before moving it to the refrigerator to cool completely.

4. For the Frosting: Beat the cream cheese, sugar, and vanilla together until smooth. Fold in the whipped cream. When the bars are fully cooled, spread the frosting over the top of the bars.

5. Serve and enjoy the taste of summer!

Rhubarb Pie Recipe

Rhubarb Pie Recipe

Rhubarb Pie Recipe

Rhubarb Pie Recipe

Rhubarb Pie Recipe

Rhubarb Pie Recipe

Rhubarb Pie Recipe

Rhubarb Pie Recipe

Rhubarb Pie Recipe

SUMMER!!! RHUBARB!!! BALING HAY!!! For me, rhubarb pie and baling are directly linked. You can’t have one and not have the other! If you haven’t gathered, I’m a farm girl. Baling hay is probably one of the hottest summer chores ever invented and everyone is always starving by the time they finish. Most of the time I stay back at the house, make rhubarb pie, and watch my little brother while my Dad, brothers, and some hired help do the actual baling. Occasionally I drive the tractor, but it’s not as easy as it sounds to steer a tractor, a baler, and a wagon all at once. I have to look back often to make sure that everything is on course and it makes me wish that I had eyes in the back of my head. Anyway, our tradition is this: after baling, everyone flocks to our pond and dunks in. Then we eat pizza and rhubarb pie and ice cream. :)

Sometimes the people who come to help bale seem puzzled about rhubarb pie. Rhubarb pie? Isn’t rhubarb a vegetable? The answer is yes. Rhubarb is a vegetable but it tastes very much like fruit. It is tart and sour, but that is why the pie has so much more zing than other pie recipes. It is my one of my family’s favorite pies and it always disappears quickly. In fact, this morning one of my brothers wandered into my bedroom and told me something that I simply had to share! “Hey Katy… I had a nightmare last night. I dreamed that our dog ate the last slice of rhubarb pie.” I had a good laugh over that!  That might just go to show you how much my family loves rhubarb pie. The filling is sweet and tangy, and the crust is always promisingly buttery, flaky, and crisp. There is always the perfect amount of goo but it’s never too messy to present well! If you have any doubts about this recipe (simply because of the fact that rhubarb is a vegetable) then I dare you to make it. IT IS SO GOOD!!! (If you have never seen nor heard of rhubarb, I’ve attached a picture of it at the bottom of the post.)

Rhubarb Pie Recipe:

(From Betty Crocker)

For Crust:

2/3 cup butter

2 cups flour

1 tsp. salt

4-5 Tbsp water

For the Filling:

4 cups chopped rhubarb

1 2/3 cup sugar

1/3 cup flour

1/2 tsp. orange peel

2 tbsp. butter

Directions:

1. Preheat the oven to 425 degrees and set out an ungreased 9 inch pie plate.

2. For the crust: I sometimes cheat on this part and you can too if you want. What I do, is I just throw the ingredients in my electric mixer and pulse it, so as not to lose the flakiness of the crust (add the water 1 tbsp. at a time between pulses). If you don’t want to cheat, keep on reading this step. Cut butter into flour and salt until particles are the size of small peas. Sprinkle in water, 1 tablespoon at a time, tossing with fork until all flour is moistened and pastry almost cleans the sides of the bowl.

 3. Gather dough into a ball and cut it in half.  Roll out one of the halves of dough on a lightly floured surface until the pastry is about two inches larger than inverted pie plate. Fold the pastry into quarters; ease into plate and unfold. Then press it firmly against the bottom and side.

4.  For the filling: Mix the flour, sugar, orange peel, and rhubarb together in a large bowl until rhubarb is thoroughly coated. Dump the filling into the pie plate, making sure that it is evenly spread, and dot the butter on top.

5. Roll out the other half of the dough on a lightly floured surface until the pastry is about two inches larger than pie plate. Fold the pastry into quarters; ease it onto the filling and carefully unfold it. Cut off any excess dough, leaving about an inch of dough hanging off of the pie plate’s edge. Fold the dough under and flute.

6. Cover the fluted edge with aluminum foil so that it will not burn and place the pie plate on a cookie sheet. Cut slits in the  crust top and sprinkle the crust generously with sugar. (DO NOT SKIP OR SKIMP ON THE SUGAR! It bakes on very well and makes the crust 100% even more delicious!)

7. Bake the pie for 35 minutes. Remove the foil and bake for 10-15 more minutes. When you take it out, it should be a rich golden brown (as pictured above) and thick syrupy goo should be bubbling out of the slits.

8. Enjoy warm with a scoop of vanilla ice cream and a happy heart!

Rhubarb

Rhubarb

Strawberry Shortcake Recipe

Strawberry Shortcake Recipe

Strawberry Shortcake Recipe

Strawberry Shortcake Recipe

Strawberry Shortcake Recipe

Strawberry Shortcake Recipe

Strawberry Shortcake Recipe

Strawberry Shortcake Recipe

Strawberry Shortcake Recipe

Strawberry Shortcake Recipe

Strawberry Shortcake Recipe

Ah! It feels so good to be back on the blog after being on vacation for two weeks. Before I left I was baking like crazy so that I would have some recipes to post as soon as I got back; however, typing two blog posts at once seemed a lot harder to write when I wrote them consecutively. Oh well. So here I am, sitting in front of the computer typing about typing. I guess I’ll stop boring you with such dull matters now. :)

It used to be that I despised almonds on top of my strawberry shortcake, but this time was different. I find it oddly amusing to observe how my tastes in food change over time… it seems like everything I love now I couldn’t stand then. Anyway, the almonds- they added such a nice crunch to the soft, moist  shortcake! It was a lovely contrast and only got better when I added some fresh strawberries for zing, ice cream to repel the heat of summer, and cream because it was simply too healthy (note the sarcasm:)… oh, and maybe some whipped cream would be nice, too. My mom makes this recipe (from my aunt), at the very least, once every summer when the strawberries come into season, and it is always a much anticipated treat!

Strawberry Shortcake Recipe:

For the Cake:

3/4 cup white sugar

2 1/3 cup Bisquick

1 egg

1/2 cup milk

2 tbsp. butter

1 tsp. vanilla

For the Crumble Topping:

1 tbsp. butter

1/4 cup brown sugar

1/4 cup almonds

For the Garnish:

strawberries

whipped cream

half and half cream

vanilla ice cream

Directions:

1. Preheat the oven to 350 degrees and set out a greased 8×8 inch pan.

2. For the cake: In a medium bowl, mix all the ingredients together by hand. Pour the batter into the prepared 8×8 pan. Bake for 15 minutes before adding the  topping (directions below).

3. For the crumble topping: In a small bowl, mix the almonds and the brown sugar together. Cut the butter into the bowl and mix the mixture with your hands until the butter is thoroughly crumbled into the topping. Sprinkle the topping on (after the cake has been baking for 15 minutes) and bake the cake for an additional 15 minutes or until an inserted knife comes out clean.

4. Serve each piece of cake with the suggested garnishes. This dessert will totally get you into the summer mood! Enjoy!!!

Sprite Cake Recipe

Sprite Cake Recipe

Sprite Cake Recipe

Sprite Cake Recipe

Sprite Cake Recipe

Sprite Cake Recipe

Sprite Cake Recipe

Sprite cake has got to be one of the easiest recipes to make on the planet. This cake is a perfect summer treat! It’s light, fluffy, has a sweet zing from the fruit, and it is well loved by all. It’s perfect when you don’t want to fuss over a dessert for guests, because you can just whip this one off in no time and it has high marks in presentation as well as taste. :)

Sprite Cake Recipe (by katydidbakeit):

1 (18.25 oz.) box Pillsbury white cake mix

1(12 oz.) pop can sprite

1 (12 oz.) container cool whip

fruit for garnish (optional)

Directions:

1. For the cake: Follow the directions on the back of the cake mix box, except substitute the sprite for the water. Allow the cake to cool completely before spreading the cool whip over the top. Garnish the cake with fruit (in the picture there are just strawberries and blueberries, although I’m sure it would be good with just about anything… peaches, kiwis, or toasted shredded coconut). Refrigerate until served.

2. Enjoy!

Creamy Caramels Recipe

Creamy Caramels Recipe

Creamy Caramels Recipe

Creamy Caramels Recipe

Creamy Caramels Recipe

Creamy Caramels Recipe

Creamy Caramels Recipe

“Oh, caramel! Shall I compare thee to a summer’s day?” My sister and I use that phrase for anything that we love… and my sister adores caramels! My sister was desperately wanting this recipe to be put to use, so we made the candies when we were pressed for time and ended up finishing the caramel 2 1/2 minutes before we had to leave for a graduation party. At this point, I hadn’t even gotten out of my pajamas yet and my dad gave me a quizzical look. “You are I coming with us, right?” he asked. Of course I was! Thus, I set my record speed for getting my makeup, hair, and outfit presentable and polished in the course of two minutes. I was (and obviously still am) very proud of that time. :)

As for the caramels, they tasted horrible. Kidding!!! They were great!!! I love the taste of caramels and these ones were very creamy (hence the name) and deliciously soft, making the perfect caramel recipe. As for the bonus: these caramels are very easy to make if you just have a good candy thermometer. If you’re not sure that your thermometer is accurate, see my Note: at the bottom of the recipe. :)

Creamy Caramels Recipe:

4 cups sugar

1 cup (2 sticks) butter + some for greasing the pan

4 cups (1 qt.) half-and-half
3/4 cup light corn syrup
 Directions:
1. Grease bottom and sides of a 13×9 inch pan with butter.
2. In a large saucepan and over medium heat, heat the sugar, corn syrup, butter, and two cups of half-and-half over medium heat, stirring constantly. Stir in remaining half-and-half to boiling. Continue to cook over medium heat, stirring all the while, until the caramel mixture is 245 degrees (if you would like to see pictures of the boiling process, see below) Immediately pour the mixture into the prepared pan.
3. Allow the caramel to cool for several hours to room temperature. Cut the caramel into squares or rectangles and, if you like, wrap them in wax paper .
4. Time to know the true glory…. OF CANDY!
Note:
If you aren’t sure that your thermometer is accurate, boil some water and see what the thermometer reads the temperature as. If it reads as 212 degrees, it is accurate. If it does not, (say it read 214 degrees) then you know that it is two degrees too hot; therefore, you should heat the caramel mixture to 243 degrees (according to your inaccurate thermometer) in order for it actually to be 245 degrees on an accurate thermometer. I hope that I explained that clearly. :)
Stage one of the boil

Stage one of the boil

Stage two of the boil

Stage two of the boil

The last stage of the boil- ready for the pan

The last stage of the boil- ready for the pan

Butterhorns Recipe

Butterhorns Recipe

Butterhorns Recipe

Butterhorns Recipe

Butterhorns Recipe

Butterhorns Recipe

Butterhorns Recipe

I think my dad was very happy when I made these butterhorns. In his family, they were a much anticipated thanksgiving treat that his mom and sisters made. When I found this recipe in one of our cookbooks, I could hardly read the writing on it… I’m assuming that’s because it was a well-used recipe. My mom actually had to re-write it for me because I had such a hard time trying to decipher the writing or, rather, the Morse Code. :D Besides, I want to be able to make these for my dad next thanksgiving!

These horns were great! They had a nice fluffy inside and a delectable buttery flavor. They are a very good accompaniment to any dinner and are satisfyingly… perfect. They are the type of rolls that you might see in movies, where the actor scoops up a roll and hungrily devours it. That’s about how people are in real life when they see these rolls. :)

Butterhorns Recipe:

4- 41/2 cups flour

2 1/4 tsp. yeast

1 cup milk

1/3 cup sugar

1/3 cup butter + some for brushing

1 tsp. salt

2 eggs, room temperature

Directions:

1. Preheat the oven to 170 degrees. In a small bowl, combine 2 cups of flour and yeast. Set aside.

2. In a medium sauce pan, heat the milk, sugar, butter, and salt together until it is 115-120 degrees, stirring constantly. Add the wamr milk/butter mixture to the flour/yeast mixture.

3. In a bowl fitted to an electric mixer with a dough hook attatchment, add the eggs and beat the dough on a low speed for 1/2 minute. Then beat the dough on high for three minutes. Stir in remaining flour. Transfer the dough to a large, greased bowl. Cover it with a clean towel and set it in the preheated oven to rise until double, about one hour. (do not turn the oven off when you remove the bowl. You will need it again).

The dough for the butterhorns before it rises

The dough for the butterhorns before it rises

4. Grease two large baking sheets. On a floured surface, roll the dough out into a 12 inch circle. Cut the dough into twelve wedges  and brush some melted butter onto each wedge.

Cut the circle into twelve wedges

Cut the circle into twelve wedges

Then roll up each wedge (start from the wide end and roll towards the pointy end) and set them on the greased baking sheets. Set them in the preheated oven to rise until double, about 30-45 minutes.

The butterhorns are done rising

The butterhorns are done rising

5. When the “horns” are done rising, preheat the oven to 375 degrees and bake them for 12-15 minutes.

6. Serve warm and snarf!

Peanut Butter Pie Recipe

Peanut Butter Pie Recipe

Peanut Butter Pie Recipe

Peanut Butter Pie Recipe

Peanut Butter Pie Recipe

Peanut Butter Pie Recipe

Peanut Butter Pie Recipe

I have been looking for a good peanut butter pie recipe for ever. No matter what recipe I found or looked at, none of the pies seemed quite right… even this one (adapted from LoveThatFood.com) had to be tweeked a little by some random teenager called Katy. :) Anyway, other than some fixed proportions, I didn’t have to change much. I just thought that… hm… perhaps it would be best if the crust covered the bottom and the sides of the pie plate instead of sparsely coating the bottom.

For me, this recipe hits two birds with one stone. Cream cheese and peanut butter! Could it get much better??? I’ve been craving peanut butter lately and ever since my uncle mentioned peanut butter pie to me I knew that I had to get my hands on a recipe! I have found that I’ve been getting better at finding good recipes online whereas when I first started, I came across many bum recipes. The key is not to focus on the presentation of the dessert… look for goo. Look for messy. And make sure you like the taste of the ingredients. :)

This pie was a hit. My family devoured all but one tiny slice of pie which no one could manage to squeeze in. My sister, after one bite, said “Put this pie on the favorites list.” So, I guess I should respect by elders and obey… what a bummer (NOT!!!!!!!!!). Anyway, the peanut butter pie was very soft, creamy, flavorful, and the oreos added a great crunch to contrast the fluffy, pudding-y filling.

Peanut Butter Pie Recipe:

For the Crust:

2 1/4 cups double stuf oreo cookies crumbs (about 20 cookies)

7 tbsp. white sugar

7 tbsp. butter, melted

For the Filling:

1 cup creamy peanut butter

1 (8 oz.) package cream cheese

1 cup sugar

1 tbsp. butter

1 tsp. vanilla

1 cup heavy whipping cream

For the Topping (optional):

1/4 (12 oz.) bags milk chocolate chips (melted), grated chocolate, or oreo cookie crumbs

Directions:

1. For the Crust: Preheat the oven to 375 degrees and set out one pie plate. In a small mixing bowl, mix the crushed oreos, butter, and sugar together until well combined. Press the mixture into the pie plate and bake it for ten minutes. Remove the pie from the oven and, if the crust has sunken to the bottom of the plate, use a spoon to re-press the crust (while it’s hot) to the pan. Allow it to cool completely.

2. For the Filling: In a large mixing bowl, mix all of the filling ingredients (except the whipping cream) together by hand until smooth. In a separate bowl fitted to an electric mixer, whip the whipping cream until stiff peaks form. Fold the whipped cream into the peanut butter mixture until well combined. Pour the filling into the cooled pie plate and place the pie in the freezer (no worries, the pie does not get hard in the slightest… it gets chilled but remains soft. That’s how mine was even after I left mine in the freezer for several hours!).

3. For the Topping (optional): Melt the chocolate chips and use a fork to drizzle the melted chocolate over the pie; return the pie to the freezer until it is served. OR sprinkle the grated chocolate over the pie before returning it to the freezer. OR sprinkle the oreo crumbs over the pie before returning it to the freezer.

4. For the Eating: This part is fairly self-explanatory, I think… :)

Blueberry Crumble Pie Recipe

Blueberry Crumble Pie Recipe

Blueberry Crumble Pie Recipe

Blueberry Crumble Pie Recipe

Blueberry Crumble Pie Recipe

Blueberry Crumble Pie Recipe

Blueberry Crumble Pie Recipe

This recipe was another one of my tests. The first time I made it I used a different filling and it turned out super runny. Of course, everyone was saying “Katy this is so good! It’s not a good pie if it isn’t gooey!” I had a hard time trying to explain to them that there is a fine line between gooey and runny. I just didn’t think that I should have to serve pie in a bowl… :) And, as usual, I have my summer-time pie fever. Something about making pies is just so fun to me… they are, by far, my favorite baked goods to make.

This recipe is based off of a family favorite (apple crumble pie. See my post on it!) from the Devil’s Food Cookbook, but I switched out the apple pie filling for a blueberry pie filling by Betty Crocker. The pie got rave reviews and the best thing is that, for all you people out there who hate rolling out pie crusts, this crust recipe is a piece of cake or, more literally, easy as pie. Anyway, the crust has almost a creamy flavor (hence the cream cheese I guess…) and is matched well by the crumb topping. The filling complements both, of course, and knowing that it’s a blueberry filling, I don’t suppose that much could go wrong with it. :) The lemon frosting is a nice touch of zing (but not at all overpowering) and is the perfect finishing touch to the decadence.

Blueberry Crumble Pie Recipe:

For the Crust:

1 cup flour

1/2 cup (1 stick) butter

4 0z. (1/2 package) cream cheese

For Filling:

4 cups fresh or frozen blueberries

1/2 cup white sugar

1/3 cup flour

1/2 tsp. cinnamon

1 tbsp. lemon juice

1 tbsp. butter

 For Crumb Topping:

1/4 cup white sugar

1/4 cup light brown sugar

1/2 tsp. cinnamon

1 cup flour

1/2 cup (1 stick)  butter

For Glaze:

1/2 cup powder

2-3  tsp. lemon juice

Directions:

1. Preheat the oven to 425 degrees and grease a 9 inch pie plate.

2. For crust: In a medium bowl, cut the butter into the flour with a knife . Using your hands or a pastry cutter, mix the butter-flour mixture to a coarse mixture. Add the cream cheese and continue mixing with your hands until a soft dough forms. Press the dough into the prepared pie plate.

3. For the Filling: Combine all of the filling ingredients except for the lemon juice and butter. Pour the filling into the pie plate and dot the butter on top before sprinkling the lemon juice over the filling.

5. For the Crumb Topping: Mix all of the ingredients except for the butter together in a small bowl. Cut the butter in and use a pastry cutter to make a crumbly mixture. Spread all of the crumble mixture over the pie and make sure that you cover all of the pie’s edges. You should not be able to see any filling.

6. Place the pie plate on a cookie sheet and bake for ten minutes. Then reduce the oven’s heat to 325 degrees and bake for 50-60 more minutes or until the crumble topping starts to turn a light golden brown. Allow the pie to cool.

7. Mix the powdered sugar and the lemon juice. Start off adding less lemon juice than suggested. Keep adding juice until the frosting is thin enough to drizzle. Be careful not to make it too thin, however, or the frosting will just soak in and the pie will not look as pretty.

8. Serve warm with a scoop of ice cream… on a plate, not in a bowl. :)

Sugar Cream Pie Recipe

Sugar Cream Pie Recipe

Sugar Cream Pie Recipe

Sugar Cream Pie Recipe

Sugar Cream Pie Recipe

Not too many people have heard of sugar cream pie (it’s an Amish recipe and very popular in Indiana, I guess) and I hadn’t either until my sister’s boyfriend requested a post on it at the beginning of the year. From what I hear, he’s been religiously checking my blog for a post on sugar cream pie, so here it is, several months later. :) My sister told me that she would probably have to make the pie for her boyfriend as soon as he saw the post, so… time to get baking, Sis!

It took me FOREVER to get this recipe. There was some trial and error, but I managed to stumble across this recipe (adapted from Kismet, Art & Life). When I made sugar cream pie for the first time, it turned out that the recipe I made needed to be baked for two hours… and it still wasn’t quite done when I took it out. I made a mental note never to use that recipe again.

I made the pie on Memorial Day, so I got plenty of feedback… what was the feedback? Great! The pie had a pudding-like, creamy filling and a crisp, sweet top to complement it. The crust was flaky and the whole thing put together was quite a treat! It was actually a bit like Creme Brulee, in terms of the pudding-like consistency and crisp top. It’s no wonder it was such a hit!

Sugar Cream Pie Recipe:

For the Crust (by Betty Crocker):

1/3 cup butter

1 cup flour

1/2 tsp. salt

2-3 tbsp. water

For the Filling:

2 cups heavy whipping cream

1/2 cup milk

1/2 cup flour

1/2 cup brown sugar

1/2 cup white sugar

2 tsp. vanilla

1 tbsp. butter

For the Topping:

1 tsp. cinnamon

3 tbsp. white sugar

Directions:

1. Preheat the oven to 350 degrees and set out an ungreased pie plate.

2. For the Crust: I sometimes cheat on this part and you can too if you want. I just throw the ingredients for the pie crust in my electric mixer and pulse the mixer, so as not to lose the flakiness of the crust (add the water 1 tbsp. at a time between pulses). If you don’t want to cheat, continue reading this step. Cut butter into flour and salt until particles are the size of small peas. Sprinkle in water, 1 tablespoon at a time, tossing with fork until all flour is moistened and pastry almost cleans the sides of the bowl.

3. Gather dough into a ball and roll it out on a lightly floured surface until the pastry is about two inches larger than inverted pie plate. Fold the pastry into quarters; ease into plate and unfold. Then press it firmly against the bottom and side. Cut off any excess dough, leaving about one inch of dough hanging off of the pie plate’s lip. Fold the dough under and flute.

4. For the Filling: Cut the butter onto the unbaked pie shell. In a medium bowl, mix all of the ingredients together with a wire whisk. Pour the creamy mixture into the prepared pie plate. For the Topping: Mix the sugar and cinnamon together and sprinkle all of the mixture over the cream filling.

5. Cover the fluted edge with aluminum foil so that it will not burn and place the pie plate on a cookie sheet. Bake the pie for 1 hour before removing the aluminum foil… then bake for 15 more minutes. Remove the pie from the oven and allow it to cool.

6. Served warm or chilled anytime of the day or night. :)

Mississippi Mud Cake Recipe

Mississippi Mud Cake Recipe

Mississippi Mud Cake Recipe

Mississippi Mud Cake Recipe

Mississippi Mud Cake Recipe

Mississippi Mud Cake Recipe

Mississippi Mud Cake Recipe

This recipe is my dad’s classic birthday request- he loves it and so does everyone else! It is very easy to whip up and what I love about making it is that you don’t have to wait for the cake to cool before adding the frosting. It always seems like I have to wait forever before frosting each cake and so this one was a nice breather. :) Some nice, consolidated baking. Anyway, the cake is absolutely to die for. It is soft and gooey and… hits you like a brick. It is a very dense cake, but it is totally worth every bite!

And what is it with me and coconut? Ever since I finished my recent coconut obsession, the stuff seems to be gravitating into the recipes that I’ve been making. Oh well… such a pity (not). While I am reminded of coconut, I will suggest you to use Angel Flake Coconut for all or at least most recipes calling for coconut. Never ever use Kroger brand! It is too dry and not very flavorful. I often laugh at how Kroger claims “Kroger quality guaranteed!” because they never specify what quality they guarantee… high quality or low quality? :)

Mississippi Mud Cake Recipe:

For the Cake:

1 cup (2 sticks) butter, melted

2 cups sugar

1 1/2 cups flour

4 eggs

1/3 cup cocoa

1 cup coconut

1/2 cup pecans

For the Filling:

1 (7 oz.) jar marshmallow creme

For the Frosting:

6 tbsp. butter

1 square (1 oz.) unsweetened chocolate

1/4 cup milk

3 cups powdered sugar

1 tsp. vanilla

Directions:

1. Preheat the oven to 350 degrees and grease a 13×9 inch pan.

2. For the Cake: In a large bowl, hand stir the butter, sugar, and flour together. Add the eggs and mix until you are sure that they are well incorporated. Add the chocolate, coconut, and pecans and mix thoroughly. Pour the cake batter (it will be thick) into the prepared 13×9 inch pan. and bake it for 40 minutes or until an inserted knife comes out clean.

3. For the Filling: Immediately spread the marshmallow creme over the hot cake. I found that it is best to spoon it on in globs, wait for it to melt a bit, and then spread it… otherwise the creme starts ripping up the cake. Set the cake aside to let it cool a little while you make the frosting.

4. For the Frosting: In a medium sauce pan, heat the butter, chocolate, and milk over medium heat until the chocolate and butter have both melted. Add the powdered sugar and then the vanilla (the frosting should be running at first but sets up to be fudgy). Immediately and carefully spread the runny frosting over the marshmallow creme and allow it to cool to room temperature.

5. Serve the cake with ice cream if you really want, but it’s a pretty stand-alone cake in my opinion. Enjoy!

Butterbeer Recipe

Butterbeer Recipe

Butterbeer Recipe

Are you a Harry Potter fan? Who isn’t, right??? Of course everyone’s mouth waters at the mention of all of the decadent foods in the Harry Potter Series, including butterbeer, the famous and well-loved beverage of the wizards and witches. I fortunately stumbled across this recipe on Bakeat350 and it is by Feast of Fiction. There are three types of butterbeer, so check out the video that I attatched if you like! http://youtu.be/WTn5SJLTnek

The butterbeer was very good. I thought that the butterbeer and the whipped cream nicely complemented each other. A nice, refreshing gulp of  chilly “beer” was accented by the pleasantly sweet (but not too sweet) whipped cream and caramel drizzle. It was an excellent introduction to summer! I remember having a similar version of butterbeer at my aunt’s house when I was at a Harry Potter party with my cousins. We wore Harry Potter costumes or waved our wands around as we ran around drinking butterbeer, taking pictures, watching people spray each other with temporary red hair dye, and piling into the car (or rather, the fleet of cars) to go to the movie theater and watch the second part of Harry Potter and the Deathly Hallows. Butterbeer seems to have a fun spell surrounding it… :)

Butterbeer Recipe:

For the Beer:

1 tbsp. butterscotch caramel plus some for garnish

1 cup ice cubes

1 (12 oz.) can cream soda

2 tsp. artificial butter flavoring

For the Whipped Cream:

1 cup heavy whipping cream

6 tbsp. sugar

1 tbsp. vanilla

2 tsp. artificial butter flavoring

Directions:

1. For the Whipped Cream: In a large bowl fitted to an electric mixer, beat all of the ingredients together until the cream is stiff and fluffy. Set aside.

2. For the Beer: In a blender, combine all of the ingredients together and blend until there are no large chunks of ice and the butterbeer is foamy. Pour the butterbeer into some glasses and top the beer with the whipped cream. Drizzle butterscotch caramel over the whipped cream with a fork.

3. Slurp!

Oatmeal Coconut Cookies Recipe

Oatmeal Coconut Cookies Recipe

Oatmeal Coconut Cookies Recipe

Oatmeal Coconut Cookies Recipe

Oatmeal Coconut Cookies Recipe

Cookies! Cookiescookiescookiescookiescookies!!! I’ve found that quite often I get caught up in the baking world and forget about the simple stuff, the foundation of baking. You can get tired of having such large, filling, and fattening desserts sitting around and that’s when I decided to make a batch of cookies. Sometimes, it’s time for a semi-break. As for the cookies, they are soft, flavorful, and very addicting- the perfect recipe for a quick and easy dessert!

After this recipe, my hunger for coconut has (almost) been quenched. I’m not sure what it is with me, but I go in phases in not only baking, but in everything. I can often find entertainment in my own ridiculous obsessions. :) I’m also enjoying the fact that my brothers are home from college. That means that desserts don’t stay for long. Most of the time it’ll take us almost a week to go through just one batch of oatmeal cookies but this time… they were gone before dinner. :)

Oatmeal Coconut Cookies Recipe:

1/2 cup (1 stick) butter

1/2 cup white sugar

1/2 cup brown sugar

1 egg

1/2 tsp. vanilla

3/4 cup flour

1/2 tsp. baking soda

1/2 tsp. salt

1 1/4 cups oatmeal

1/2 cup coconut

Directions:

1. Preheat the oven to 350 degrees and set out two ungreased cookie sheets.

2. In a large bowl fitted to an electric mixer, cream the butter, sugars, egg, and vanilla together until smooth. Add the rest of the ingredients and mix them together until everything is well incorporated.

3. Roll the cookie dough into balls and place them on the ungreased cookie sheets. Bake the cookies for 10 minutes or until the very edges start turning golden brown. Allow the cookies to cool on the pans (they will be too soft to remove at first but they firm up as they cool.) Repeat with the remaining dough.

4. Bon appetite!

Cream Cheese Pie Recipe

Cream Cheese Pie Recipe

Cream Cheese Pie Recipe

Cream Cheese Pie Recipe

Cream Cheese Pie Recipe

Cream Cheese Pie Recipe

Cream Cheese Pie Recipe

This recipe (adapted from Glorious Treats) is reeeeeeeeeeeally good! When I saw it, I thought that it was just going to be a sort of cheesecake that someone opted to call a pie. Not so! Here’s where the difference comes in: it isn’t baked at all. It has no eggs, less cream cheese, and it actually is a cream cheese pie.  In fact, the pie has more sweetened condensed milk than cream cheese. Anyway,  back to the taste. This recipe is summer-y, sweet, savory, gooey, creamy, crunchy, butter-y… and just about everything else. The crust is what adds the nice crunchy, butter-y flavor and the filling is creamy, gooey, and has some zing from the lemon. The strawberry sauce adds the summer-y factor. Is there any better way to be reminded of summer than to eat a strawberry garnished slice of cream cheese pie?

When I finished taking pictures of the pie, everyone dug in… except for my brothers, who were in their bedroom playing a well-loved game called The Settlers of Catan. So, my sister and I took the opportunity to play a prank (it was especially fun since one of my brothers is absolutely crazy about strawberries). We left two slices for our brothers and hid them. When they finished their game and came to get a serving of pie, I told them that it was gone. “What?!?” my strawberry-loving brother exclaimed. My sister and I exchanged a grin and I went to retrieve their pie slices. Oh the fun of baking!

Cream Cheese Pie Recipe:

For the Crust:

2 cups finely crushed graham crackers

1/2 cup (1 stick) butter, melted

3 tbsp. sugar

For the Filling:

1 (8 oz.) pkg. cream cheese, room temperature

1 (14 oz.) can sweetened condensed milk

1/3 (about 1 lemon) cup fresh lemon juice

1 tsp. vanilla

For the Strawberry Sauce:

1 pint strawberries, divided

4 tbsp. sugar

2 1/2 tsp. corn starch

3 tbsp. water

Directions:

1. For the Crust: Set out an ungreased 9 inch pie plate and preheat the oven to 350 degrees. In a small bowl, mix the graham crackers, butter, and sugar together until well combined. Then press the mixture into the pie plate and bake the crust for 10 minutes or until lightly browned. Allow the crust to cool completely.

2. For the Filling: In a small bowl, mix the ingredients for the filling together with a whisk or a fork until smooth. Pour the filling into the cooled graham cracker crust and refrigerate the pie for about 3 hours or until it has set up.

3. For the Strawberry Sauce: In a blender, blend the water and half of the strawberries. Strain the strawberry-water mixture. Next, in a small saucepan, mix the sugar and cornstarch. Whisk the mixture as you slowly add add the strained strawberry juice so that there are no lumps. Heat mixture to a boil and boil about 1 minute.  Remove the sauce from the stove. Slice the rest of the strawberries into pea sized pieces and add it to the strawberry sauce. Allow the sauce to cool in the refrigerator until it is ready to be used.

4. Top your slice with the strawberry sauce and yuuuuuuuuuuuuuuuuuuuuuuum! Ah, the taste of summer!

Cinnamon Raisin Bread Recipe

Cinnamon Raisin Bread Recipe

Cinnamon Raisin Bread Recipe

Cinnamon Raisin Bread Recipe

Cinnamon Raisin Bread Recipe

Cinnamon Raisin Bread Recipe

Cinnamon Raisin Bread Recipe

All that I have to say about this recipe (adapted from Betty Crocker) is this: “YUM!!!” I must say that the combination of the soft cinnamon swirled bread with raisins and frosting is extremely scrumptious! (The frosting was my own addition to the recipe.) The inside is nice and soft with more of a crisp crust. And no, it’s not just a dessert that happens to be called “bread.” It’s pleasantly sweet, but not too sweet to be served with a dinner. It’s very versatile. It’s great for breakfast, lunch, dinner, or dessert!

My brother (the same one that called the Coconut Custard Cake “popcorn salad cake”) nicknamed this recipe “bread cake.” He certainly comes up with names worth keeping. :) He loves it when I make cakes. Whenever he sees that I’m baking something he asks if it going to be a cake. Unfortunately, most of the time it’s not.

As for the first time I made this recipe- it was disastrous. This recipe was the first yeast bread that I ever made. It was dense and looked uncannily like a whale. Yesterday I decided to give it another try since I have now had much more experience and also I have an often-used thermometer in my grasp to help me along. :)

Cinnamon-Raisin Bread Recipe:

(Makes two loaves)

For the Bread:

4 1/2 tsp. or two packages active dry yeast

3/4 cup warm water (105-115 degrees)

2 cups lukewarm milk (same temp. as water)

3 Tbsp. sugar

3 Tbsp. butter

1 Tbsp. salt

7  to 8 cups flour

1 1/2 cups raisins

For the Cinnamon Swirl:

1/2 cup sugar

4 tsp. cinnamon

2 tbsp. butter

For the Frosting:

powdered sugar

milk

vanilla

a dash or two of cinnamon

Directions:

1. Dissolve yeast in warm water in a large bowl fitted to an electric mixer. Stir in milk, sugar, butter, salt and four cups of flour. Beat until smooth. Mix in the remaining flour and the raisins.

2. Preheat the oven to 170 degrees. Turn dough onto lightly floured surface; knead until smooth and elastic, about 10 minutes or use a dough hook attatchment on an electric mixer and “knead” the dough for about seven minutes on medium speed or until smooth and elastic. Place the dough into a greased bowl. Put the dough in the preheated oven and cover it… then let the dough rise until it has doubled in size, about 1 hour. Note: I preheated the oven for 2 minutes before turning it off and putting the dough in there. A lot of the time, your house isn’t warm enough to allow the dough to properly rise.

Nice. And. Big.

Nice. And. Big.

3. Punch the dough down; divide it into halves. Roll each half into a rectangle about 18×9 inches. In a small bowl, mix the sugar and the cinnamon. Spread half of the cinnamon-sugar on each rectangle and brush 1 Tbsp. of butter on each rectangle of dough.  Roll up tightly, starting at the narrow end (9 inch end). Press each end of the dough with the side of your hands to seal; fold the ends under.

Roll it up starting at the narrow (9 inch) end

Roll it up starting at the narrow (9 inch) end

Seal the ends with your hands

Seal the ends with your hands

Put the bread seam-side down in the pan

Put the bread seam-side down in the pan

4. Place the loaves seam-sides down in the greased bread pans. Brush lightly with butter. Put the loaves in the oven (preheated to 170 degrees) once more, uncovered, and let them rise until double, about 1 hour.

It's ready to be baked!

It’s ready to be baked!

5. Place loaves on low rack so that the tops of the loaves are in the center of the oven. Pans should not touch each other or the sides of the oven. Bake until loaves are golden brown and sound hollow when tapped, about 20-25 minutes. Remove the bread from the oven and immediately remove the loaves from the pans.

The bread hath been bake-ed

The bread hath been bake-ed

6. Mix the ingredients for the frosting together with a fork until smooth and be sure that it is your preferred consistency for drizzling it on. Then, using a fork, drizzle the frosting on the loaves.

6. And now… eat it before anyone else can get to it!

Hello Dollies (Magic Cookie Bars) Recipe

Hello Dollies (Magic Cookie Bars) Recipe

Hello Dollies (Magic Cookie Bars) Recipe

Hello Dollies (Magic Cookie Bars) Recipe

Hello Dollies (Magic Cookie Bars) Recipe

I had never had Hello Dollies before today (I adapted this recipe from a cookbook loaned to me by my piano teacher, so I don’t know who to source). Anyway, as always, I was really in the mood for baking… and using a recipe that included coconut. :) This recipe is definitely a keeper. I love the gooiness! It’s a wonderful combiniation of a soft and  buttery crust with sweetened condensed milk (which you can never go wrong with!), a crunch from the pecans, flavor from that fabulous coconut, and a final melty touch of chocolate. Not to mention that theses bars are super super easy to make. My mom told to hide them from her. I know I’ve done a good job when she gives me that verdict!

Hello Dollies (Magic Cookie Bars) Recipe:

2 cups crushed graham crackers

1/2 cup (1 stick) butter

1 (14 oz.) can sweetened condensed milk

1 1/2 cups coconut

1 cup pecans (or nuts of your choice)

3/4 cup (6 oz.) milk chocolate chips

Directions:

1. Preheat the oven to 350 degrees (325 degrees if you are using a glass pan) and set out an ungreased 13×9 inch pan.

2. Put the stick of butter in the pan; place the pan in the oven until the butter has melted completely. Remove the pan from the oven and stir the graham cracker crumbs into it. Press the crust firmly down and pour the sweetened condensed milk over it. Next, sprinkle all of the coconut over the milk… then sprinkle the nuts on. Last but not least, sprinkle the chocolate chips on.

3. Bake the bars for 25-30 minutes or until the edges of the bars start to turn golden brown.  Allow the bars to cool in the pan coompletely. Note: They will make a mess if you don’t cool them completely! :)

4. “Mmm, these are good. MMMM! Oh, mmm! Mmmm!

Coconut Cream (Evaporated Coconut Milk) Recipe

Coconut Cream (Evaporated Coconut Milk) Recipe

Coconut Cream (Evaporated Coconut Milk) Recipe

This one is simple… extremely simple. All you have to do is wait. Literally, all you do is stick some coconut and milk on the stove and stir it a few times. It’s one of those recipes that might seem long if you sit there and stare at it, but it really depends on how you choose to spend your time while you wait for it to boil down. :) Anyway, this recipe is invented by me. Of course it only takes a milk lover and a coconut lover to come up with this… or a coconut milk lover! Fortunately, I am all of the above. The day after I made the Coconut Custard Cake (see my post on it!), I thought “Hey! Why on earth can’t I find evaporated coconut milk in the store? I guess I’ll make my own coconut cream!” So that’s how it began. I looked up how to make evaporated milk and all I did was boil the milk and the coconut together to make a smooth, coconut flavored cream to go in coffee, tea, over oatmeal, porridge, or whatever you think it would be good on or in. Anyway, the coconut cream tasted great! Everyone who has tasted it has loved it. It has a consistency that lies somewhere between evaporated milk and sweetened condensed milk.

One concern that I had about it at first was whether or not 1% milk would be creamy enough to use in the recipe. All of the recipes for evaporated milk that I looked up called for 2% or Vitamin D milk. So, I decided to give 1% milk a try, and it turned out very rich and creamy! :)

Coconut Cream (Evaporated Coconut Milk):

Makes 1/2 to 1 cup coconut cream

3 cups 1% or more% milk

1 cup shredded coconut

Directions:

1. In a large saucepan, mix the coconut and milk together. Over high heat, bring the milk mixture just to a boil before reducing the heat to medium. Allow the milk/coconut mixture to simmer for about one hour. Be sure to stir it every five to ten minutes so that a “skin” does not form on the milk’s surface. It’s no big deal if it does (just stir it back in), but the skin forms to prevent the milk from evaporating, which is a bit contradictory to the goal here. :)

2. When the hour is up, remove the cream from the heat and strain it into a bowl. Then pour it into a jar and store it in the refrigerator. You’re all done! Enjoy!

Straining out the Coconut

Straining out the Coconut

To the Jar!

To the Jar!

Coconut Custard Cake Recipe

Coconut Custard Cake Recipe

Coconut Custard Cake Recipe

Coconut Custard Cake Recipe

Coconut Custard Cake Recipe

Hm… what should I say about this recipe (from the Gooey Desserts cookbook)? Maybe it’s just one of my new favorite cake recipes ever!!! It is SUPER moist  because of the custard filling and it is also SUPER soft and  gooey, a total comfort food.  I would only recommend making this cake, however, if you have an accurate thermometer and some time on your hands. If you don’t have an accurate thermometer, GO GET ONE NOW. It is that good! The frosting is very fluffy and is hugely complemented by the toasted coconut, an absolute must! The cake is very soft and the custard filling makes it wonderfully gooey. Not to mention that coconut is just a great flavor in my opinion.  It used to be that I couldn’t stand coconut. Even just a month ago, I only liked coconut. I think when that really changed for me was when I went on a trip to Saint Lucia. I had fresh coconut there and I think that made me go coconut crazy. I find it hilarious to go to my recipe index page because then I can see all of my latest ingredient obsessions… strawberries, cream cheese… now coconut. :)

I finished making this cake at ten o’clock one night and my brother clambered out of bed to see it. What was his name for it?  Popcorn-Salad Cake! I loved that. Well then, I guess I’ll get on to the Popcorn-Salad Cake Recipe… I’m sure you’re dying to know what the ingredients are!

Coconut Custard Cake Recipe:

For the Cake:

2 2/3 cups flour

1 3/4 cups white sugar

1 1/2 tsp. baking powder

1/2 tsp. salt

1 cup (2 sticks) butter, softened

4 egg yolks (save the egg whites)

1 1/2 tsp. vanilla

1 cup coconut milk (see the note at the end of the post)

1/2 cup shredded coconut

4 egg whites

For the Coconut Drizzle:

1 cup coconut milk

1 tsp. white

For the Coconut Custard Filling:

1 1/4 cups milk

1 1/4 cups coconut milk

5 eggs yolks (save 3 egg whites for the fluffy frosting)

1/2 cup sugar

3 tbsp. cornstarch

1 tsp. vanilla

1 1/3 cups shredded coconut

For the Fluffy Frosting:

1/2 cup water

1 cup light corn syrup

1 1/2 cups white sugar

3 eggs whites

Directions:

1. For the Cake: Preheat the oven to 350 degrees. Grease 2 round 9 inch cake pans. Line the bottoms of the pans with waxpaper and grease again (waxpaper is very essential. Greasing alone does not work, trust me!!!!) At the end of the post, I can show you what happens to a cake when you don’t use waxpaper. I think you’ll get a kick out of it.

2. Using an electric mixer, cream the butter and sugar until smooth. Add the yolks one at a time and beat until well incorporated. Add vanilla and altetnately add thecoconut milk and the flour. Foild in coconut.  Using an electirc mixer, beat the egg whites until stiff… then gently fold them into the batter.

3. Pour the batter into the preparexd cake pans. Bake for about 25 minutes or until an inserted knife comes out clean. Wait for the cakes to coll for a few minutes before running a knife around the edges of the pans and flipping the cakes onto  wire racks to cool them completely. When cooled, cut each cake horizontally.

4. For the Custard: In a medium saucepan, heat the two milks. In a seperate bowl, beat the yolks, cornstarch, and sugar together until smooth. Whisk half of the hot milk intu the yolks, then pour  the mixture back into the remaining milk in the pot and slowly bring the yolk/milk mixture to a boil. Boil, whisking constantly, for one minute. The custard will thicken quickly. Immediately remove the custard from the heat and add the  coconut and the vanilla. Pour the custard into a bowl and place it in the freezer to cool for 30 minutes, stirring every ten minutes.

5. For the Coconut Drizzle: Mix the milk and the sugar. Using a brush, brush it onto the  layers before putting the fully cooled custard filling on.

6. For the Fluffy Frosting: Here’s where a thermometer comes in handy… bring the water, corn syrup, and sugar to a boil over medium-high heat. Cook until until the mixture is clear (230- 234 degrees). Remove the mixture from the heat. Meanwhile, beat the egg whites until stiff.

Stiff Egg Whites

Stiff Egg Whites

With the whisk attatchment on an electric mixer, beat the egg whites again as you add the hot mixture. Continue beating the mixture for 5 minutes.

7. Follow the directions on your bag of shredded coconut on how to toast the coconut. Toast as much coconut as desired, enough to top the cake’s frosting (better to toast more than not enough).

8. To assemble: Spread the custard over each cake layer and  frost with the fluffy frosting. Sprinkle the toasted coconut generously over the cake.

9. My brother is the king of the song that I have linked here. He sometimes goes around the house, belting out the refrain in an absolutely perfect voice and making it exeptionally dramatic: http://youtu.be/VLz5fSWq_jY

The Refrain’s Lyrics:

Someone left the cake out in the rain!

And I don’t think I can take it…

’cause it took so long to bake it!

And I’ll never have that recipe AGAIN!

Note:

1. If you don’t have any coconut milk on hand, it takes literally 30 seconds to make! All you have to do is blend 1 cup of milk and 1/2 cup coconut together in a blender for 30 seconds. Next, strain it, and you now have one cup of coconut milk!!! Simple as that. :)

2. This is what a cake looks like if you forget to put waxpaper on the bottom of the pan. That’s right. Yep. Lesson learned? Good!

Oops! Forgot the waxpaper for the chocolate cake!!!

Oops! Forgot the waxpaper for the chocolate cake!!!

Ooey Gooey Bars Recipe

Ooey-Gooey Bars Recipe

Ooey-Gooey Bars Recipe

Ooey-Gooey Bars Recipe

Ooey-Gooey Bars Recipe

This is my family’s go-to classic. Whenever a guest comes to our house and we can’t decide what they would like, we end up making this recipe (bingo!).  You can never go wrong with something called “Ooey-Gooey Bars” . :) This recipe is super easy to whip up as well as tasty. The crust is nice and buttery and tastes like (actually it literally is) a cake and I love the cream cheese top that makes it ooey and gooey… these bars are sweet, savory, and simple. :)

Ooey-Gooey Bars Recipe:

For the Crust:

1 box yellow cake mix

1/2 cup (1 stick) butter, softened

1 egg

For the Filling:

1 (8 oz.) package cream cheese

2 eggs

1 lb. ( 3 1/2 cups) powdered sugar

1 tsp. vanilla

Directions:

1. Preheat the oven to 350 degrees and set out a greased 13×9 inch pan.

2. In a medium mixing bowl, hand (litterally… use your hands) mix the butter, cake mix, and egg until the butter and egg is well incorporated and the cake mix it like a dough. Pat the dough into the prepared pan and set aside.

3. For the filling: With an electric mixer, beat the cream cheese, eggs, and vanilla until smooth. Add the powdered sugar and SLOWLY mix so you don’t get a mushroom cloud of sugar in your kitchen. (This may have happened to me one time, so I’m kind of speaking from experience:) Pour the mixture over the unbaked crust.

4. Bake for 30-40 minutes or until the cream cheese just starts to turn a golden brown. A knife will never come out clean, so don’t even think about using it… there’s a reason that they’re called Ooey-Gooey Bars. Allow them to cool.

5. Gobble up (and horizontally as well, I guess)!

Patriotic Perfection Pudding Recipe

Patriotic Perfection Pudding Recipe

Patriotic Perfection Pudding Recipe

Patriotic Perfection Pudding Recipe

Patriotic Perfection Pudding Recipe

This recipe, Patriotic Perfection Pudding (by katydidbakeit, adapted from a recipe from a cookbook that I borrowed, so I don’t know who to cite), was a huge hit in my family and my Dad said that it’s one of his favorites. I love the crunchy, nutty, buttery crust and the creamy, pudding-like cream cheese filling and the final touch of home-made blueberry pie filling and cherry pie filling. The recipe calls for canned cherry pie filling, but I thought that the blueberry pie filling was SO good on the top layer that it made the canned cherry pie filling taste home-made as well… so you can get great taste the cheaters way!

The original recipe calls for just canned blueberry pie filling, but here’s how it got patriotic: I had only half of the amount of blueberries I needed for the home-made pie filling, which was not nearly enough to cover a 9×13 inch pan. At this point, I remembered a can of cherry pie filling that had been in our cupboard for over a year and had still not met it’s expiration date. Bingo! So that’s what I used. After I finished making the pudding, I remarked on the red and blue top with the white filling… hence, the patriotic in the name that my sister suggested. Also the original recipe called itself blueberry pie. What a ridiculous name! It’s not pie! I had almost passed over the ultimate recipe, thinking: “Not another blueberry pie recipe!” So that’s why I re-named it. :) Anyway, enjoy!

Patriotic Perfection Pudding Recipe:

For Crust:

1 cup flour

1 cup (2 sticks) melted butter

1 cup chopped pecans

For Creamy Layer:

1 (8 oz.) package cream cheese

1 (8 oz.) package cool whip

1/2 cup butter

1 (16 0z.) box powdered sugar

1 tsp. lemon juice

For Pie Filling Layer:

 2 1/4 cups fresh or frozen blueberries (thawed and drained if frozen)

1/2 cup white sugar

1/3 cup flour

1/2 tsp. cinnamon

1 tbsp. lemon juice

1 (21 oz.) can Comstock classic cherry pie filling

Directions:

1. Preheat the oven to 350 degrees and set out an ungreased 13×9 inch pan. Arrange the oven wrack in the center of the oven.

2. For the Crust: In a small pot, melt the butter. Remove the pan from the heat and add the flour and the chopped pecans. Mix well and pour into the prepared pan. Bake for 33-37 minutes or until golden brown and the mixture is not bubbling as much as it was before… mind you it will still be bubbling some and it might slide around in the pan a bit when you remove it from the oven. Remove the pan from the oven and allow it to cool in the refrigerator until thoroughly cold and stiff. Meanwhile, do the next steps.

3. For the Pie Filling Layer: Mix the blueberries, sugar, flour, cinnamon, and lemon juice in a medium pot and cook over medium heat until it is about the consistency of canned pie filling (thick). Set aside and allow to cool in the refrigerator. Open the can of cherry pie filling and set aside.

4. For the Creamy Layer: In a large bowl, mix all of the ingredients (except for the cool whip) until smooth. Then fold the cool whip in until thoroughly  mixed in. Spread the mixture over the cooled crust and allow to cool in the refrigerator until the cream cheese layer has stiffened, about 20 minutes.

5. Pour the blueberry pie filling over the cream cheese layer. Swirl the canned cherry pie filling with the blueberry pie filling to get pretty blue-red swirls for presentation. Refrigerate until served.

6. Mmmmmmmmmmmmmmmmmmmmmmmmmmmmmmmmmmmmmmmmmmmmmm

mmmmmmmmmmmmmmmmmmmmmmmmmmmmmmmmmmmmmmmmmmmmmm

mmmmmmmmmmmmmmmmmmmmmmmmmmmmmmmmmmmmmmmmmmmmmm

mmmmmmmmmmmmmmmmmmmmmmmmmmmmmmmmmmmmmmmmmmm(etc.)